Loading
Watercolor Daily · Guides
Flat Wash Watercolor Technique: Flat and Graded in 5 Steps
11 min readBy Marcus Reed
Review
Watercolor Washes
Flat wash watercolor technique is the first thing to practise, because almost every painting starts with one. A sky, a wall, a tablecloth, a background: each is an area too big for one stroke, filled with one even color. Get the flat wash right and the graded wash, which fades from dark to light, is the same movement with water added.
This guide gives the five steps for a flat wash, the change that turns it into a graded wash, and the reasons washes go streaky.
In short: Tilt the board about 15 degrees, mix a puddle far bigger than you think you need, and lay overlapping horizontal strokes from the top down, reloading before every pass and touching each stroke to the bead left by the one above. For a graded wash, do the first quarter at full strength, then add water to the puddle every other stroke until you finish with clear water. Lift the last bead with a damp, squeezed brush and let the sheet dry flat.
How do you paint a flat wash in watercolor? (quick answer)
Mix a big puddle, tilt the board, and pull the loaded brush across the top of the paper. Reload, then lay the next stroke just below the first so it picks up the bead of liquid at its bottom edge. Repeat to the bottom, lift the last bead with a damp brush, and leave it to dry without touching it.
Overview
A wash is a layer of color laid over an area too big for one stroke. Daniel Smith's tutorial on the four basic washes calls the wash the basis for each of your paintings, and lists the flat wash first: useful for skies and any area requiring smooth color with no visible brush strokes.
Two things make a flat wash watercolor flat. The first is the bead. On a tilted board, each stroke leaves a thin line of liquid along its lower edge. The next stroke touches that bead and pulls it down, so the two strokes merge before either dries. No bead, or a bead that dried, means a hard line. The second is the puddle. Every stroke must carry the same strength of color, which means reloading the brush before each pass from a mix large enough to last the whole wash.
A graded wash is a flat wash with one change. After the first few strokes you add water to the puddle, a little more each time, so the color pales as it moves down the sheet. Daniel Smith describes the graduated or gradient wash as typically progressing from dark to light, and recommends it as an ideal background for most landscapes.
Paper matters more than brush for a flat wash watercolor exercise. A 300 gsm (140 lb) cotton sheet, taped down or in a block, takes the water without buckling into ridges that pool the wash. The best watercolor paper for beginners guide explains why cotton gives you longer before the bead dries.
What You Need for a Flat Wash Watercolor Exercise
Paper. A quarter sheet or smaller of 300 gsm cold press, taped to a board on all four sides or in a block. Daniel Smith's tutorial suggests an eighth of a 300 lb sheet or a 5 by 7 inch piece of 140 lb for practice.
A tilt. Prop the top of the board on a two or three inch book so the sheet slopes about 15 degrees. The slope is what makes the bead form and run downhill instead of pooling.
A big brush. A one-inch flat, a mop or a round of size 12 or above. The brush must cross the sheet in one stroke with paint to spare. The brushes for beginners guide covers which cheap synthetic does this.
One transparent color. French Ultramarine (PB29) or Phthalo Blue (PB15:3) are the usual practice colors, because a blue sky is the first wash most people need. Ultramarine granulates, meaning its pigment settles into the paper's texture, so expect a slight speckle. Phthalo lies flat.
A puddle. Mix far more than looks sensible, at least a few tablespoons for a quarter sheet. Running out mid-wash is the commonest cause of a streak, and you can't remix the same strength fast enough to save it.
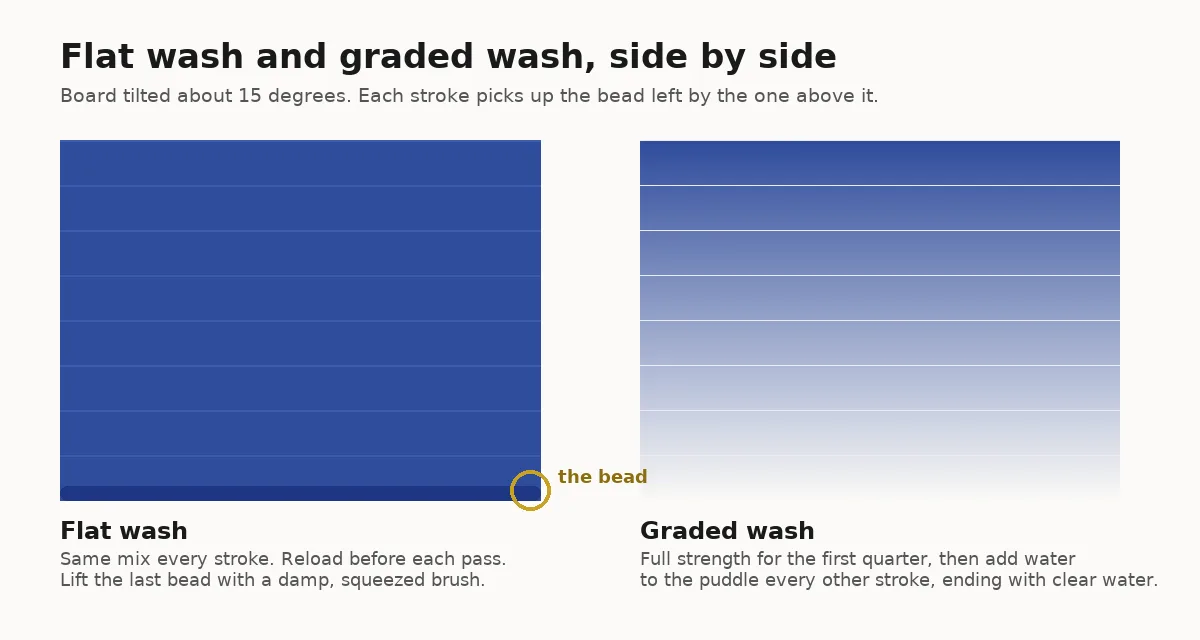 The bead is the line of liquid each stroke leaves at its lower edge. Touching the next stroke to it is what keeps a wash flat. Grading means thinning the puddle as you go down.
Step-by-Step: Flat Wash Watercolor in 5 Steps
1. Mix and tilt. Mix a large puddle of one color, stirring until there are no specks, and prop the board so the paper slopes toward you. Decide now whether you are working on dry paper or damp paper. If damp, wet the whole sheet evenly with clean water until it has a low even sheen, not a puddle. 2. Load and lay the first stroke. Fill the brush, then pull it across the top of the paper in one steady pass, from one edge to the other. Start every stroke from the same side. 3. Reload and catch the bead. Fill the brush again, then lay the next stroke so its top edge touches the bead of liquid at the bottom of the first. Gravity pulls the bead into the new stroke and the two merge. Keep going, one stroke below the last, without stopping to look. 4. Lift the last bead. When you reach the bottom, squeeze the brush out on a cloth and touch it to the bead along the last stroke. The damp brush drinks the excess. Leaving the bead makes a dark line or a bloom as it dries back into the wash. 5. Lay it flat and leave it. Once the sheen has gone, set the board flat and let the wash dry on its own. Going back in to fix a pale patch while it is damp makes a bloom. If it needs to be darker, wait, then lay a second wash over the first.
For a graded wash, follow the same five steps with one change in step 3. Daniel Smith's tutorial puts it this way: continue at full strength about one fourth of the way down the paper, then begin adding water to the puddle every other stroke, so it carries progressively less pigment and more water, and finish the bottom with clear water and no pigment at all.
Winsor & Newton's short masterclass above shows the graded wash on camera, including the point where the puddle gets water added.
GODEEPER: A flat wash on dry paper is the same movement as any wet-on-dry stroke. The wet-on-dry guide covers keeping edges crisp around the wash. Wet-on-Dry Watercolor Technique: Crisp Edges in 6 Steps →
Tips for a Smoother Flat Wash
Work faster than feels comfortable. In flat wash watercolor work the bead has a short life. A pause to look at the sky you are painting is long enough for it to dry on a warm day, and the next stroke then lands on a dry edge.
Keep the strokes overlapping by a brush width. Half the brush on the wet bead, half on dry paper. Too little overlap leaves a stripe; too much makes the top of the wash darker than the bottom.
Do not go back. A stroke that looks uneven while wet usually evens out as the wash dries and the paper pulls the color down. Touching it makes it worse. Daniel Smith's tutorial says the same: if your paper is not too wet, the wash begins to even out as you come to the bottom.
Start paler than you want. A second flat wash over a dry first one is easy and clean. A first wash that is too strong goes streaky, because thick paint doesn't flow into the bead.
Mind the edges. Pick up any wet paint sitting on the tape with a damp brush, or it creeps back under the tape as the wash dries and leaves a dark rim.
Turn the graded wash to suit the light. Paint it top to bottom, then rotate the sheet. Daniel Smith suggests painting it horizontally and turning it vertical for light coming from one side.
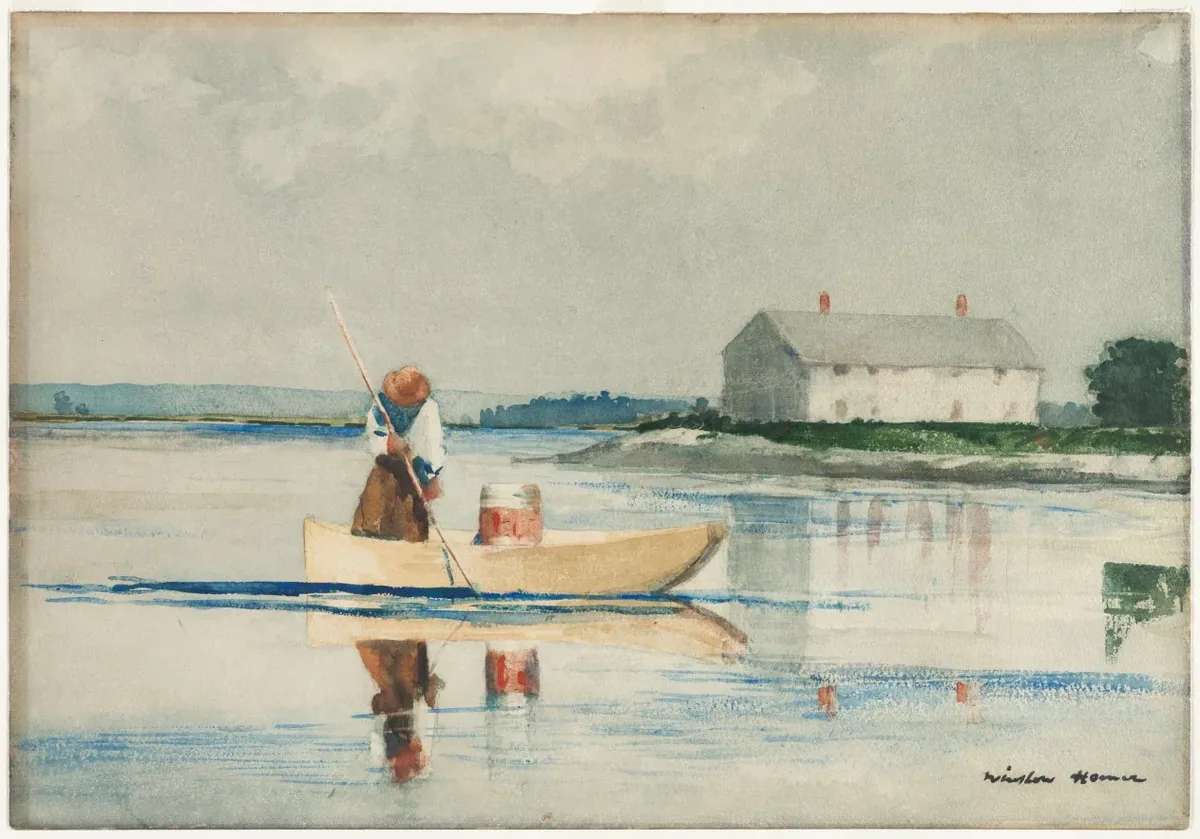 Winslow Homer, Spearing Eels, late 1800s, watercolor. The Cleveland Museum of Art, CC0. The sky is one even grey wash and the water a paler one, with the boat and house laid on top once they dried.
Why a Flat Wash Watercolor Goes Wrong
Streaks. The commonest flat wash watercolor fault. The mix ran out, or a later stroke was reloaded from a thinner part of the puddle. Mix more, stir it, and reload fully every time.
Hard lines inside the wash. A stroke dried before the next one touched its bead. Work faster, tilt the board a little more, or dampen the paper first so the bead lasts longer.
Blooms, the pale flower shapes with dark rims. Extra water or a wet brush touched a wash that was partly dry. The water pushed the pigment outward and it dried as a ring. Leave the wash alone once the sheen fades, and lift the bottom bead with a squeezed brush, never a wet one. The wet-on-wet guide explains the drying stages that cause blooms.
Pooling at the bottom. The board was too steep or the wash too wet, so the color ran down and collected. Lower the tilt a little and lift the bead at the end.
Backruns at the edges. Paint on the tape or a wet edge ran back into the drying wash. Clean the tape and the edges with a damp brush before the wash dries.
Patchy color on cheap paper. Cellulose sheets with light sizing soak up water unevenly, so parts of the wash sink in and go dull. Cotton, with gelatin sizing, keeps the wash on the surface where it can level. Stretching the sheet first, as the paper stretching guide shows, also removes the ridges that pool a wash.
GODEEPER: A flat wash of a second transparent color over a dry first wash is a glaze. The glazing guide covers which pigments stack cleanly. Glazing Watercolor Technique: 6 Steps to Layer Clean Color →
Frequently Asked Questions
What is a flat wash in watercolor? A flat wash is one even layer of a single color with no visible brush strokes, laid across an area too big for one stroke. Daniel Smith's tutorial calls it the wash for skies and any area requiring smooth color. You paint it in overlapping horizontal strokes on a tilted board, reloading the brush before each pass.
Why is my flat wash streaky? Usually one of three things: the mix ran out, so a later stroke was weaker; a stroke dried before the next one touched it, leaving a hard line; or the paper was wetter in some places than others. Mix a bigger puddle than you think you need, keep moving, and wet the paper evenly or not at all.
What is the difference between a flat wash and a graded wash? A flat wash keeps the same strength from top to bottom. A graded wash starts strong and gets paler, because you add water to the puddle as you work down the paper. Daniel Smith describes grading by adding water every other stroke after the first quarter of the sheet, ending with clear water.
Should I wet the paper before a flat wash? Either works. Daniel Smith's tutorial wets the paper evenly first, which gives you more time and helps the strokes merge. On dry paper you use a slightly thinner mix and must catch the bead at the bottom of each stroke before it dries. Beginners usually find damp paper more forgiving.
What brush is best for a flat wash? A big one. A one-inch flat, a mop or a large round, size 12 or above, holds enough paint to cross the sheet in one stroke. A small brush runs dry mid-stroke, and the reload leaves a line. For a quarter sheet, a brush that holds at least a teaspoon of wash is about right.
Related Reading
- Watercolor Block vs Pad vs Sheets: Cost per Square Inch: why a block glued on four sides keeps a wash from pooling in ridges.
- Hot Press vs Cold Press Watercolor Paper: 3 Surface Types: how each surface changes the way a wash levels.
- 12 Easy Watercolor Ideas for Beginners From 3 Tubes: the sunset sky and the rain cloud are wash exercises in disguise.
- Split-Primary Palette Guide: Mix Any Color with 6 Tubes: which blues and earths make clean wash mixes.
References
- Daniel Smith: Four basic watercolor washes, by Carmen Gardner
- Daniel Smith: Watercolor for beginners
- Daniel Smith: French Ultramarine Watercolor
- Daniel Smith: Phthalo Blue (Green Shade) Watercolor
- Winsor & Newton Masterclass: Make a graded wash (YouTube)
- Handprint: The watercolor pigments
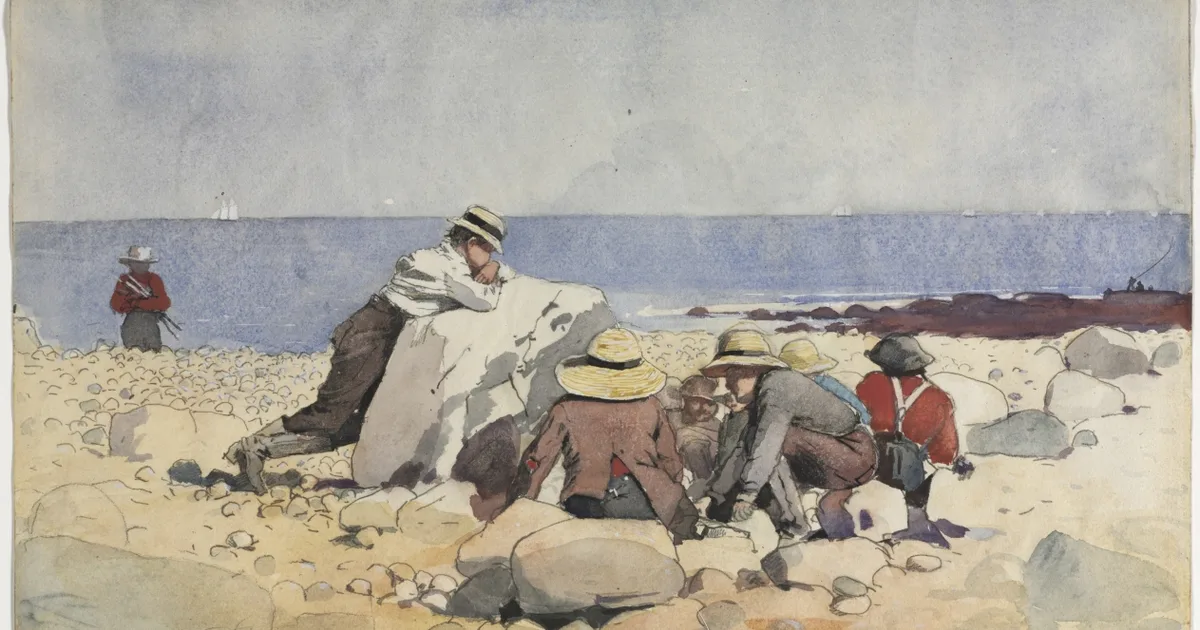
- The Cleveland Museum of Art: Winslow Homer, A Clam-Bake, 1873 (hero image, CC0)
- The Cleveland Museum of Art: Winslow Homer, Spearing Eels (CC0)
Was this guide helpful?

Written by
Marcus ReedTechnique Editor
Marcus Reed writes Watercolor Daily's step-by-step technique guides: wet-on-wet washes, glazing, dry brush, and the water control underneath them.
NextKeep reading
Guides / 12 min
Glazing Watercolor Technique: 6 Steps to Layer Clean Color
Guides / 12 min
Masking Fluid Watercolor Guide: 7 Steps and 3 Products
Guides / 10 min
How to Paint Snow in Watercolor: 9 Tips for Clean Whites
Guides / 9 min
Wet-on-Wet Watercolor Technique: Complete Beginner Guide
Guides / 11 min
Dry Brush Watercolor Technique: 8 Tips for Broken Texture
Guides / 10 min
Wet-on-Dry Watercolor Technique: Crisp Edges in 6 Steps
Guides / 14 min
How to Clean Watercolor Brushes: 7 Steps, 3 Ways to Dry
Guides / 11 min
How to Stretch Watercolor Paper: 3 Methods by Weight
Disclaimer
This article is published for informational purposes and is not professional advice. Product formulations, pigment sources, packaging and store listings change. Check the details that matter to you (price, pigment content, regional availability) with the manufacturer or retailer before you buy.