Loading
Watercolor Daily · Features
12 Easy Watercolor Ideas for Beginners From 3 Tubes
Easy watercolor ideas for beginners, 12 small paintings from one blue, one yellow and one rose. Each lists its pigment codes, paper, time and three steps.
14 min readBy Elena Vance
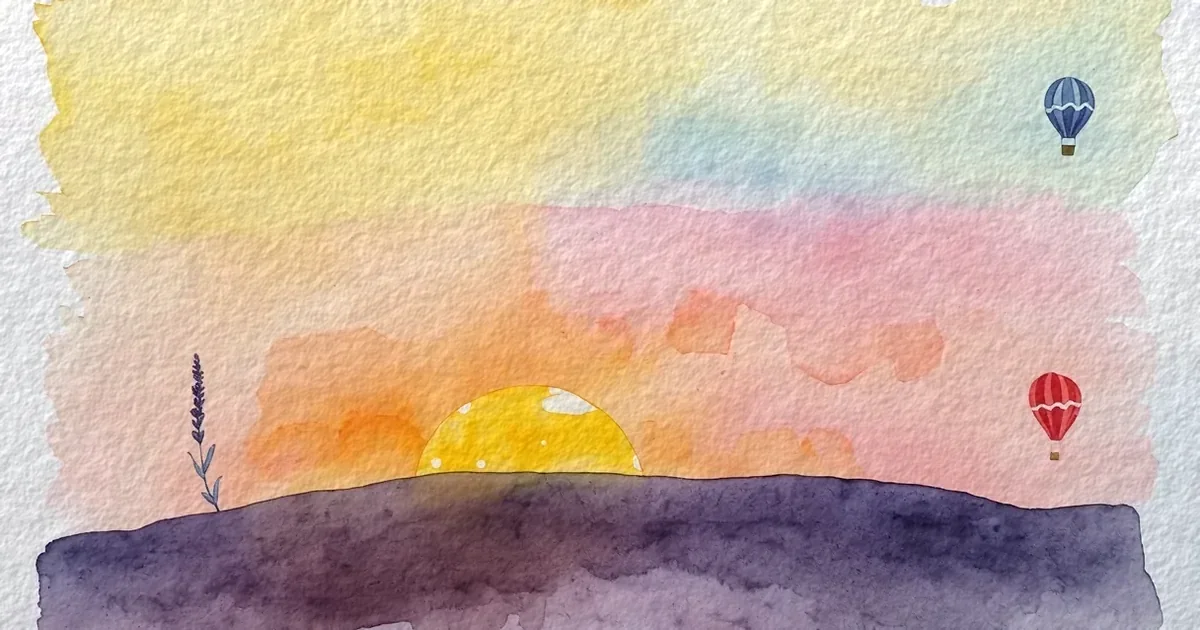
These 12 easy watercolor ideas for beginners come from three tubes of paint: one blue, one yellow and one rose. Every green, purple, orange and grey on the list is mixed from those three, so there's no big set to buy and no wrong tube to pick.
Most beginner idea lists show a picture and a title and stop there. Each idea below also tells you the colors with their pigment codes, the paper, a rough time and the order to paint it in. The first six take under 30 minutes each.
In short: Buy three tubes: French Ultramarine (PB29), Hansa Yellow Medium (PY97) and Quinacridone Rose (PV19). Paint on 300 gsm (140 lb) cold-press paper with one medium round brush. Start with the sunset sky, which takes about 15 minutes, then the lemon slice and the lavender. Save the lake and the loose roses for when you're comfortable waiting for layers to dry.
What are the easiest watercolor ideas for beginners? (quick answer)
A wet-on-wet sunset sky, a lemon slice and a few stems of lavender. Each one is a single wash or a handful of dabs with nothing to draw first. If a stroke goes wrong, it still looks like a sky, a lemon or a flower, which is the whole point of starting here.
Overview
Every idea on this list uses the same short supply list.
Paper. Cold-press watercolor paper at 300 gsm (140 lb). Cold press means the surface has a light tooth, or texture, that holds paint and water evenly. The 300 gsm weight takes a wet sky without buckling much. The best watercolor paper for beginners guide explains why a cotton sheet forgives more than a cellulose one, but a cellulose pad is fine for small pieces like these.
Brushes. One medium round, around a size 8, does almost everything here. A small round, around a size 4, helps with stems, baskets and dots.
Paint. Three tubes, all from Daniel Smith's Extra Fine range. Each one is a single pigment rated lightfastness I (Excellent) on the maker's page, which means it won't fade on display.
- Blue, French Ultramarine (PB29): a warm, transparent blue that granulates, meaning the pigment settles into the paper's texture as a fine speckle. Daniel Smith rates it medium staining.
- Yellow, Hansa Yellow Medium (PY97): a clean mid yellow, semi-transparent and low staining, so you can lift it back out with a damp brush if a shape goes wrong.
- Rose, Quinacridone Rose (PV19): a cool, transparent red-violet. It mixes clean purples with the blue and warm oranges with the yellow.
Four mixes do most of the work. Leaf green is blue and yellow, with more yellow for a spring green and more blue for a pine. Violet is blue and rose. Orange is yellow and rose. Soft grey is all three together, mostly blue, which gives you shadows and rain clouds without a black tube. If you're still choosing your first set, the watercolor supplies guide for beginners covers tubes, pans and what to skip.
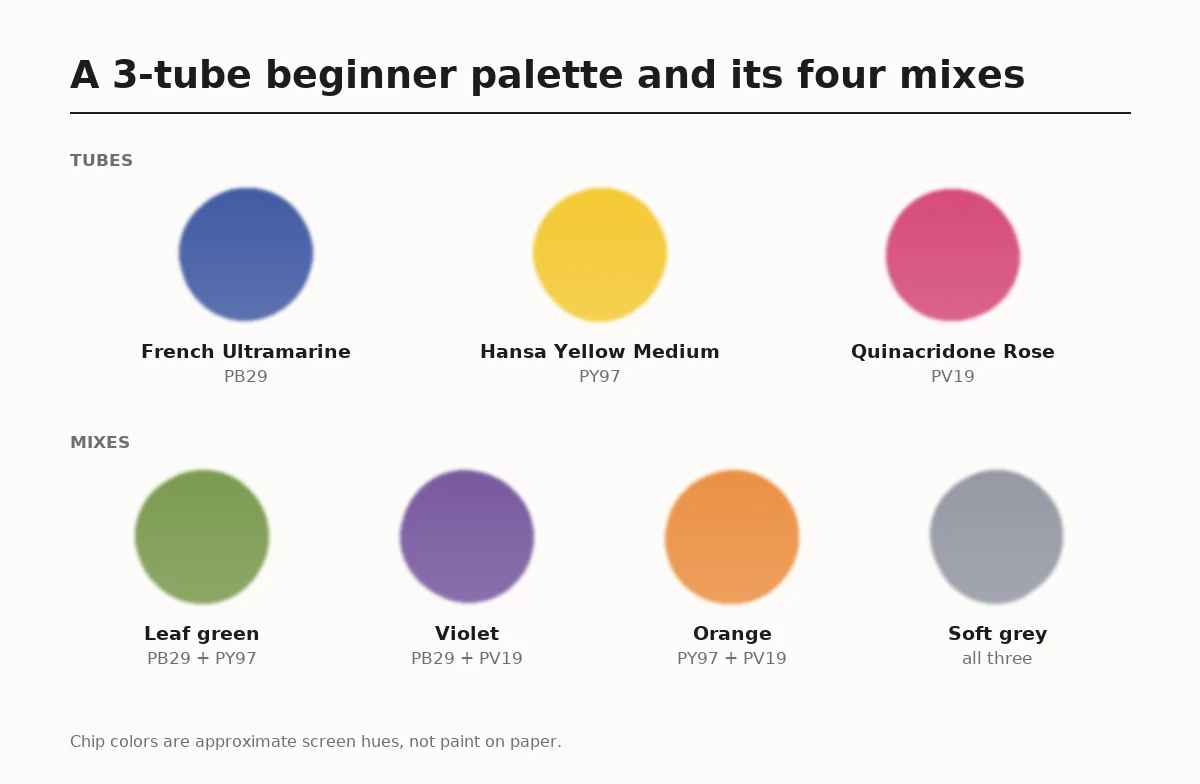 Chart of the three tubes and the four mixes used across the ideas. Chip colors are approximate screen hues.
Easy Watercolor Ideas for Beginners Under 30 Minutes
These six ideas are one wash or a few dabs each. Start with these.
1. Sunset Sky in Three Bands
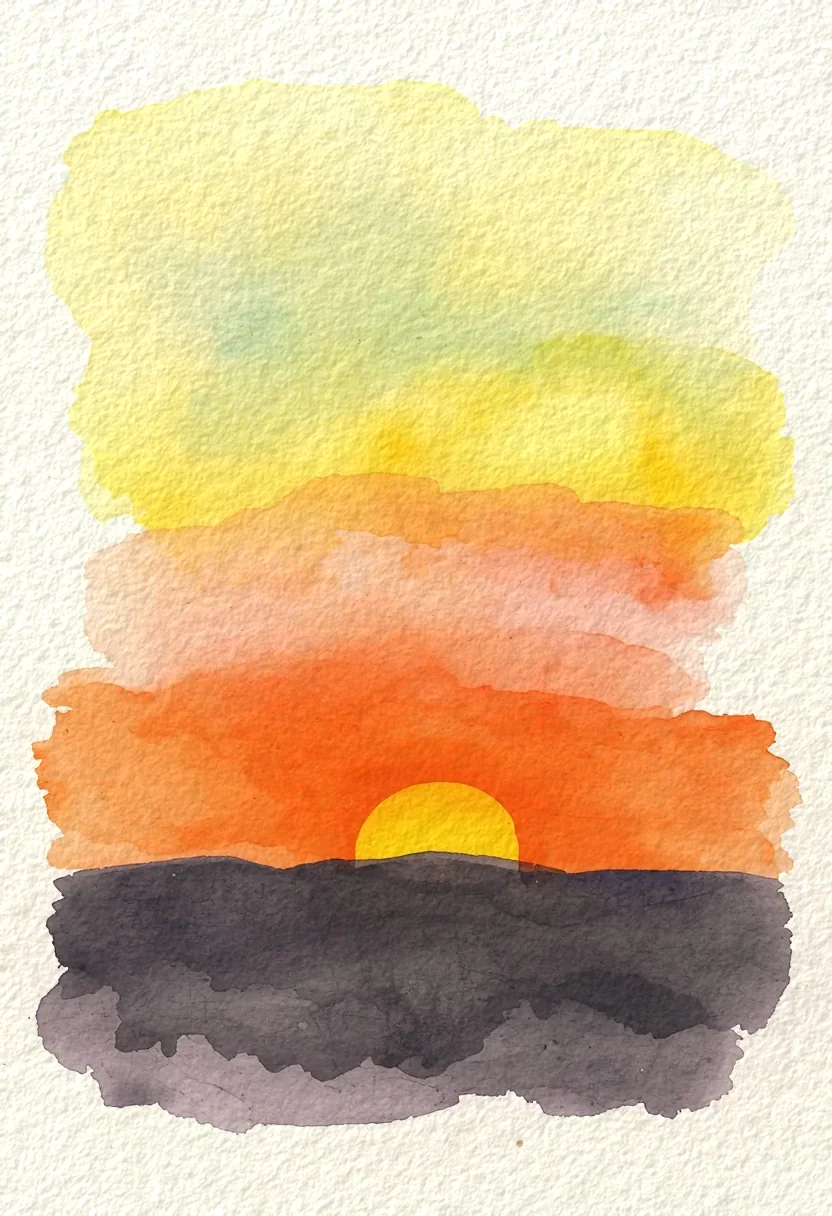 Three bands of color laid onto wet paper, with one flat dark strip for the land once the sky dried.
A sky that fades from yellow at the horizon through rose to blue at the top, over a dark strip of land. The colors do the blending for you on wet paper.
- Palette: yellow (PY97), rose (PV19), blue (PB29)
- Paper: 300 gsm cold press, taped down on four sides
- Time: about 15 minutes · Difficulty: easy
1. Wet the sky. Brush clean water over the top two thirds of the paper until it has an even shine. 2. Drop in the bands. Lay yellow along the horizon, rose above it and blue at the top, then tilt the paper so the bands soften into each other. 3. Add the land. When the sky has dried, paint one dark strip of soft grey along the bottom edge, flat and simple.
2. Lemon Slice
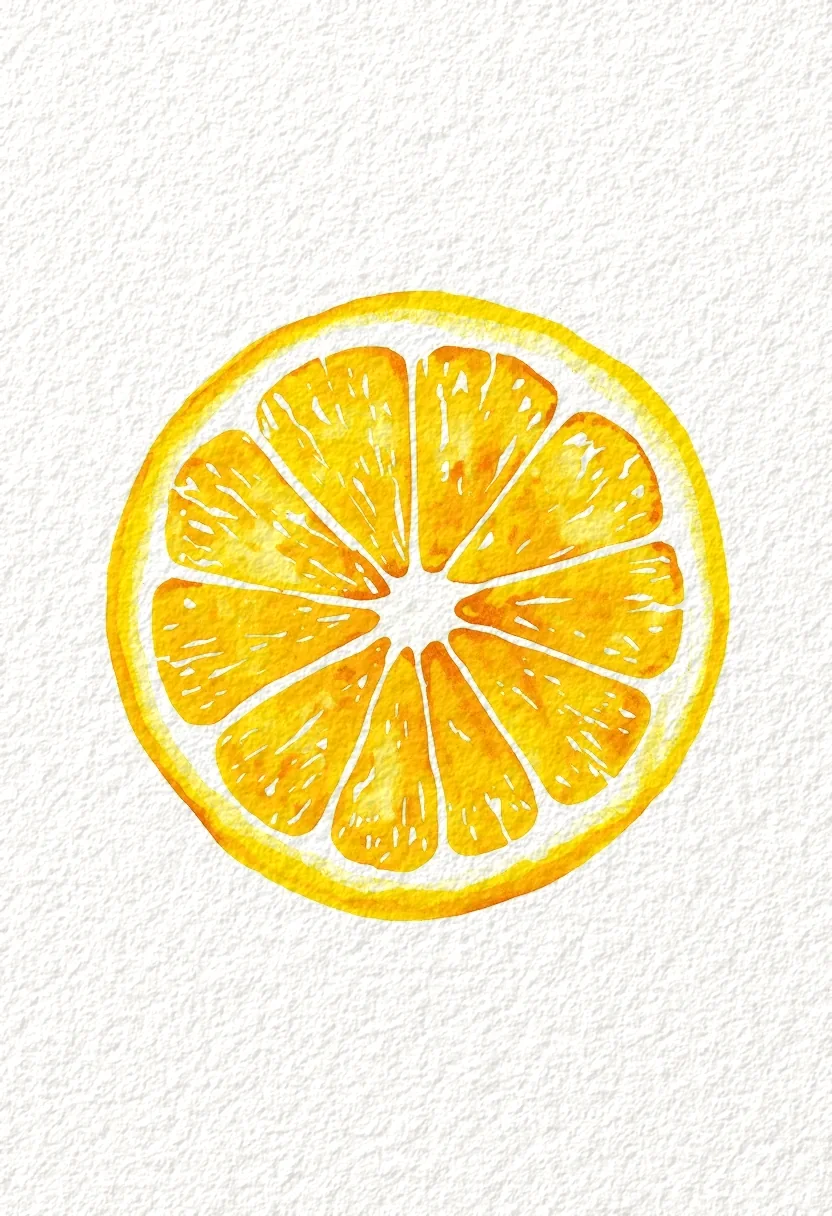 The white lines between the segments are bare paper, not white paint.
A round lemon slice with pale segments and a yellow rind. It teaches you to leave thin lines of paper white.
- Palette: yellow (PY97), a touch of rose (PV19)
- Paper: 300 gsm cold press
- Time: about 20 minutes · Difficulty: easy
1. Paint the rind. Paint a ring of strong yellow, leaving a thin white gap inside it. 2. Paint the segments. Fill the inside with eight pale yellow wedges, leaving thin white lines between them for the pith. 3. Warm one side. While the rind is damp, touch a little orange (yellow with a dot of rose) onto one edge so the slice looks round.
3. Loose Lavender Stems
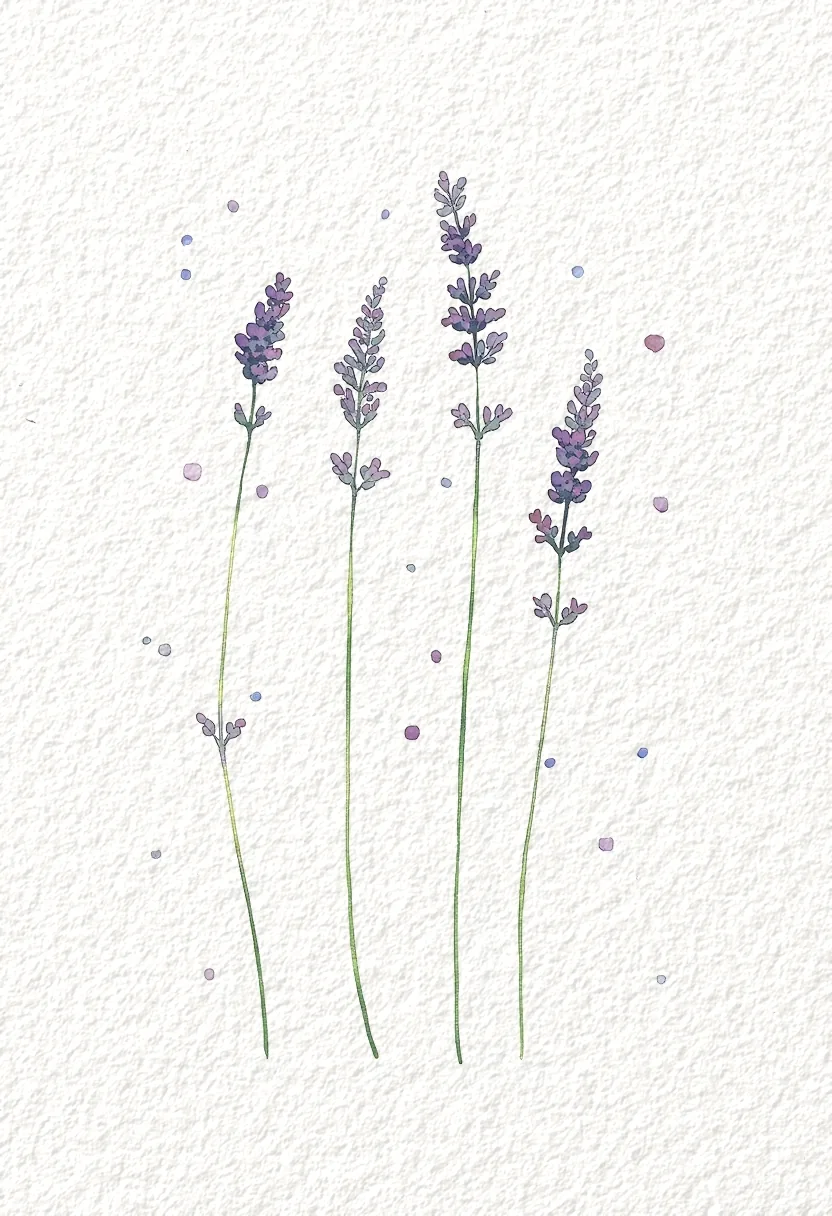 Each flower head is a cluster of small violet dabs, closer together at the top of the stem.
Three or four thin green stems with clusters of violet dots on top. The dots are the whole flower.
- Palette: blue (PB29), rose (PV19), yellow (PY97)
- Paper: 300 gsm cold press
- Time: about 15 to 20 minutes · Difficulty: easy
1. Paint the stems. Pull four long thin lines of leaf green upward with the small round, slightly curved. 2. Dab the flowers. Mix violet and dab small marks up each stem, closer together at the top and sparser at the bottom. 3. Vary the violet. Before the dots dry, touch a few of them with a little more blue so the cluster is not one flat color.
4. Hot Air Balloons
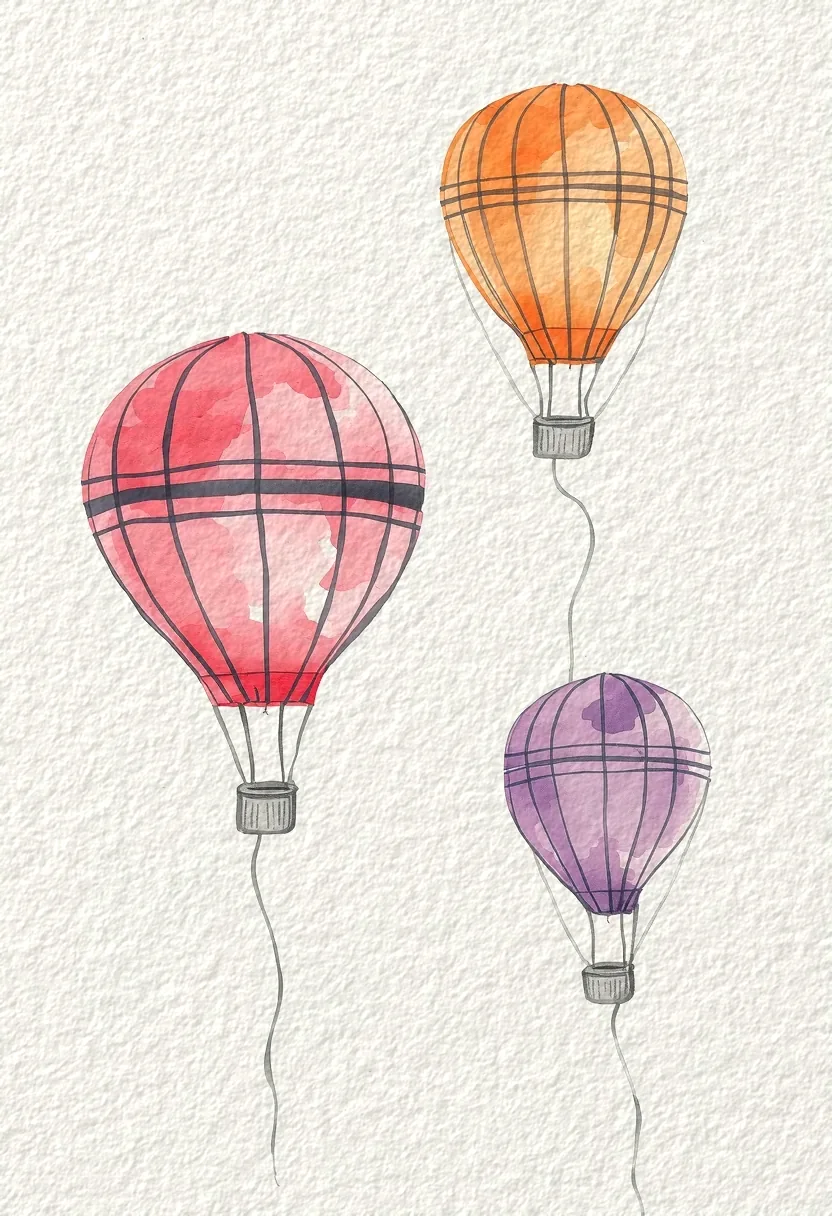 One balloon per mix from the three tubes, each with a darker stripe so it reads as round.
Three round balloons at different sizes drifting across a pale sky. Bigger balloons in front, smaller ones behind.
- Palette: rose (PV19), yellow (PY97), blue (PB29)
- Paper: 300 gsm cold press
- Time: about 25 minutes · Difficulty: easy
1. Paint the balloons. Paint three rounded shapes, one in rose, one in orange and one in violet, with a white gap between each. 2. Add stripes. While each balloon is damp, drop a stronger stripe of its own color down one side so it looks curved. 3. Hang the baskets. When dry, paint a tiny soft grey basket under each one with two thin lines for the ropes.
5. Potted Cactus
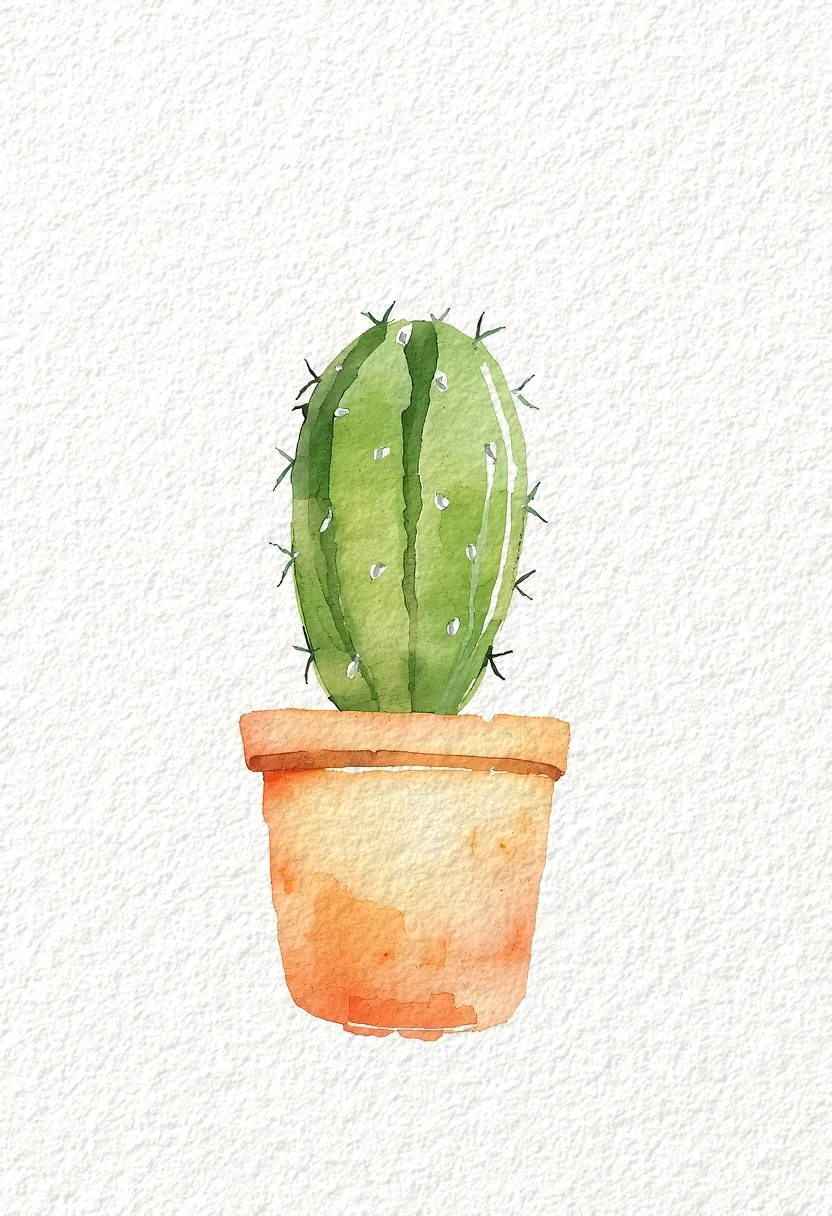 The darker green stripe down one side and the darker band at the pot rim give the shapes form.
A simple round or oval cactus in a small pot, with a few short spines. The pot is a flat shape with a shadow.
- Palette: blue (PB29), yellow (PY97), rose (PV19)
- Paper: 300 gsm cold press
- Time: about 25 minutes · Difficulty: easy
1. Paint the cactus. Paint an oval of leaf green and, while it is damp, add a darker green stripe down one side. 2. Paint the pot. When the green has dried, paint the pot in pale orange and add a darker orange band at the rim. 3. Add the spines. With the small round, dot short soft grey marks over the cactus in loose rows.
6. Rain Cloud With Drops
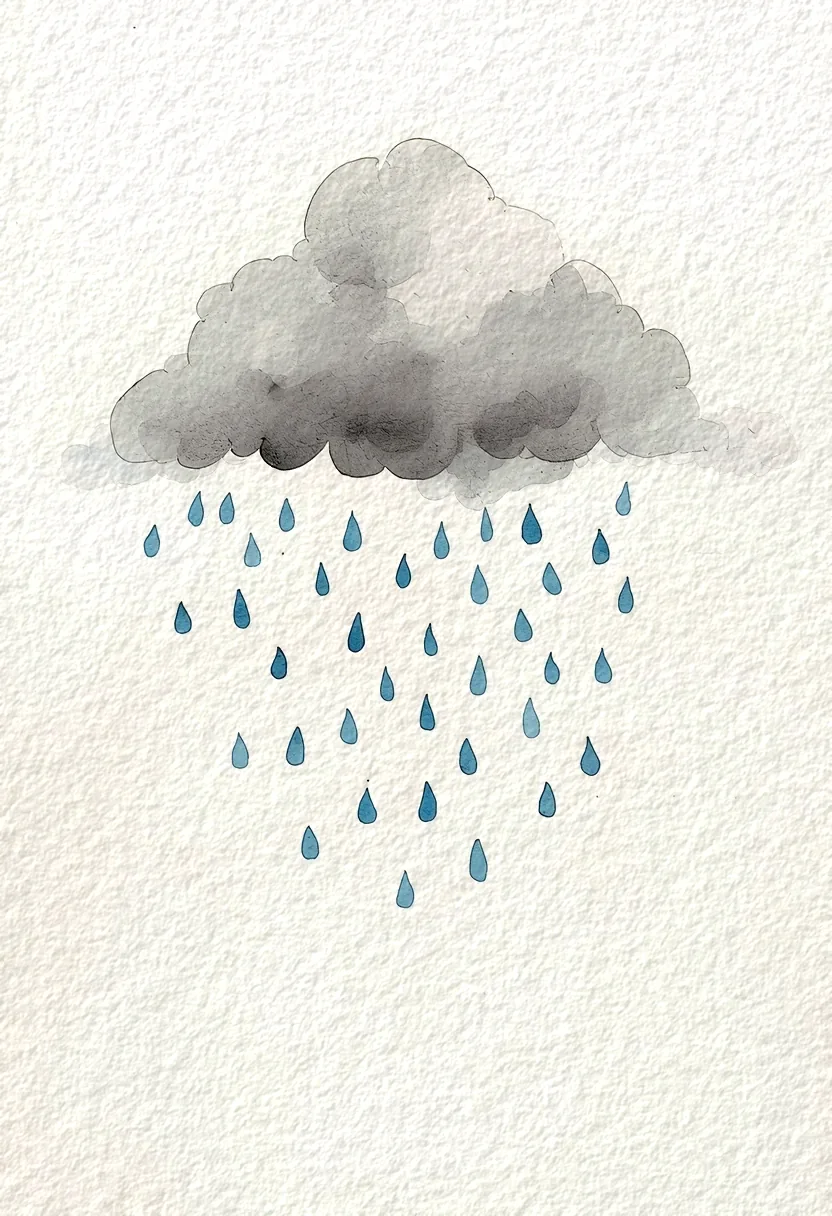 The grey is all three tubes mixed, darker along the cloud's lower edge.
One soft grey cloud with a row of blue raindrops under it. It's the quickest way to practise a mixed grey.
- Palette: blue (PB29), rose (PV19), yellow (PY97)
- Paper: 300 gsm cold press
- Time: about 15 minutes · Difficulty: easy
1. Wet the cloud shape. Brush a lumpy cloud outline with clean water. 2. Drop in grey. Touch soft grey into the wet shape at the bottom edge and let it drift upward, leaving the top of the cloud pale. 3. Paint the drops. When dry, paint small blue teardrops in a loose row under the cloud, pointed end up.
GODEEPER: Several of these ideas need a crisp edge on dry paper, such as the pot rim and the balloon baskets. The wet-on-dry guide shows how to keep those edges clean. Wet-on-Dry Watercolor Technique: Crisp Edges in 6 Steps →
Easy Watercolor Ideas for Beginners With One Extra Technique
These four easy watercolor ideas for beginners each add one new move: salt, a second layer, or a soft edge on damp paper.
7. Night Sky With Salt Stars
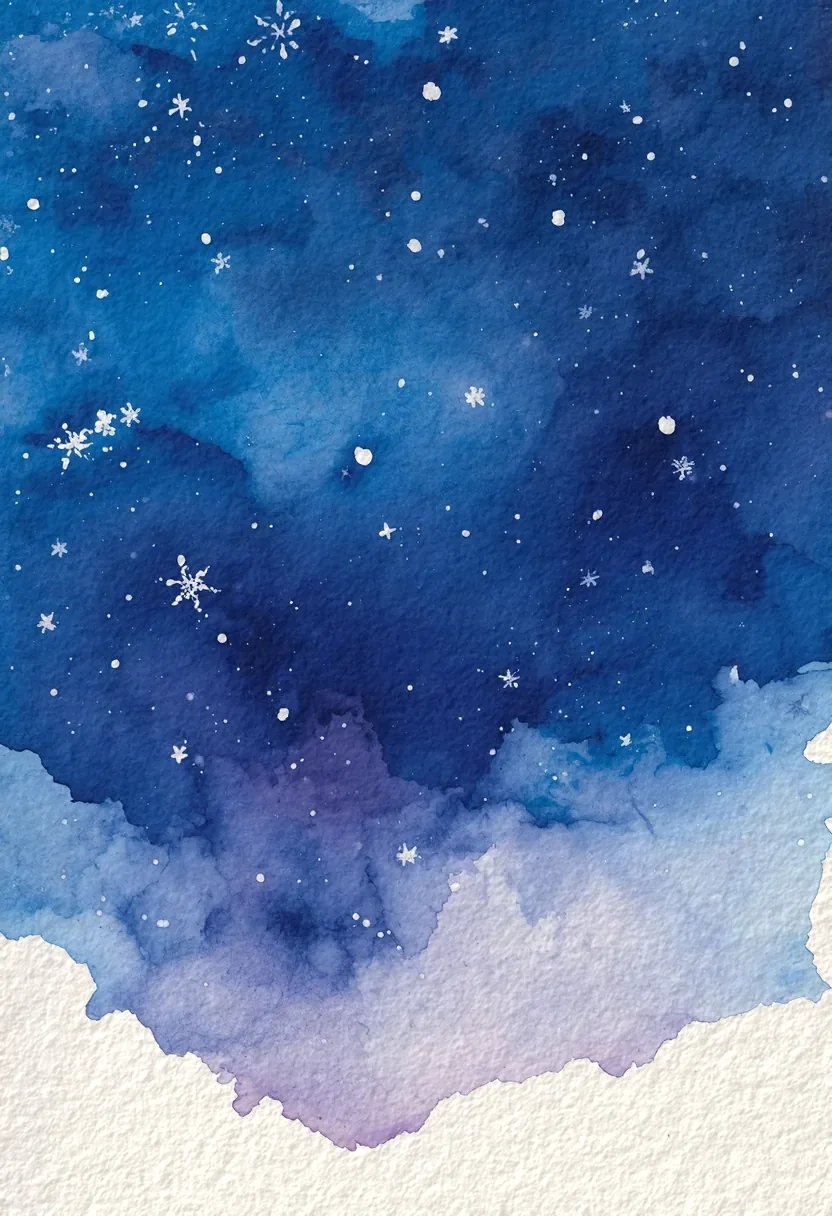 Salt sprinkled onto the damp wash pulls the pigment aside and leaves pale specks when brushed off.
A deep violet-blue sky with a scatter of pale specks made by table salt. The salt pulls water and pigment toward each grain as the wash dries.
- Palette: blue (PB29), rose (PV19), table salt
- Paper: 300 gsm cold press
- Time: about 30 minutes, mostly drying · Difficulty: easy+
1. Paint the sky. Lay a strong wash of blue, then drop violet into the lower half while it is wet. 2. Add the salt. When the shine starts to fade but the paper is still damp, sprinkle a pinch of salt over the sky. 3. Wait and brush off. Leave it to dry fully, then brush the salt away to reveal the pale stars.
8. Rolling Hills With a Path
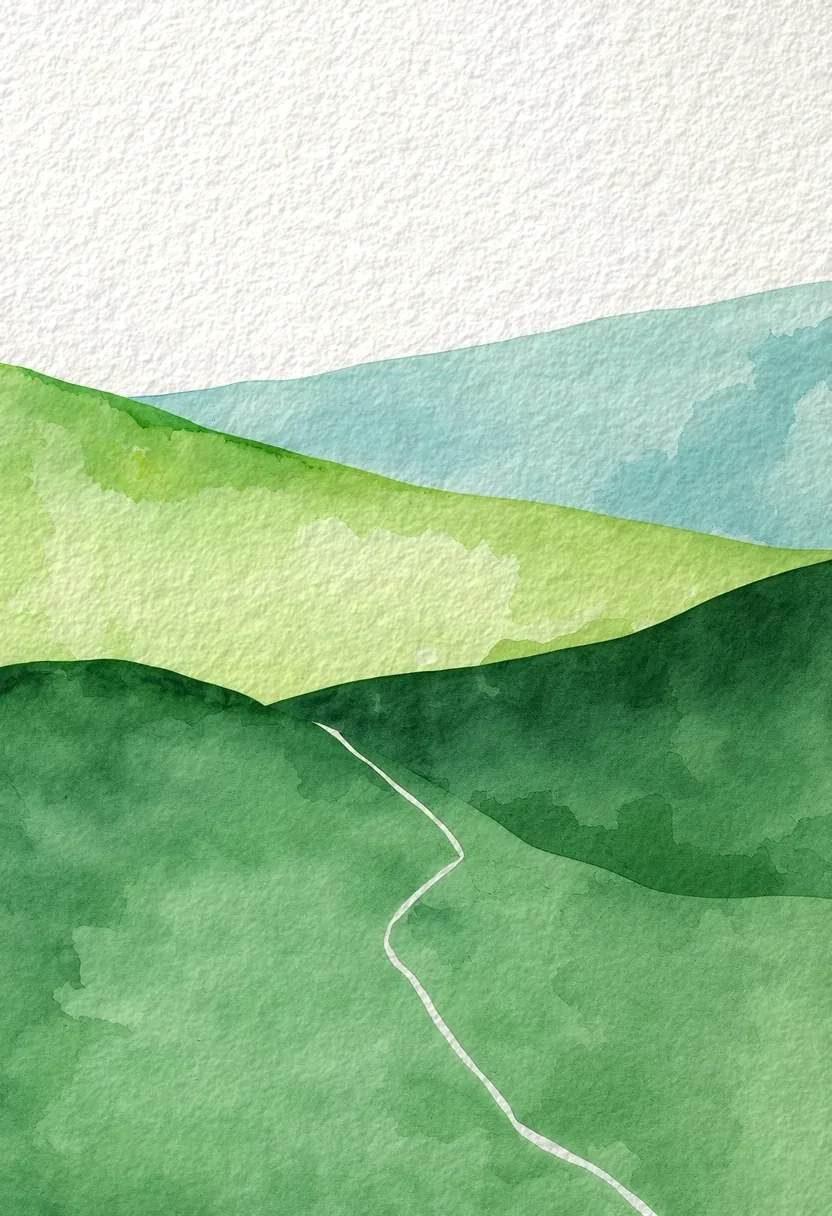 Painted back to front, each hill dry before the next, with the path left as bare paper.
Three overlapping hills in different greens, with a thin pale path winding over the front one. The hills are painted back to front.
- Palette: yellow (PY97), blue (PB29), rose (PV19)
- Paper: 300 gsm cold press
- Time: about 35 minutes · Difficulty: easy+
1. Paint the far hill. Paint a pale blue-green hill across the top third, and let it dry. 2. Paint the middle hill. Add a mid spring green hill overlapping it, and let that dry too. 3. Paint the front hill. Finish with a darker pine green hill, leaving a thin wavy strip of paper white for the path.
9. Jellyfish in a Blue Wash
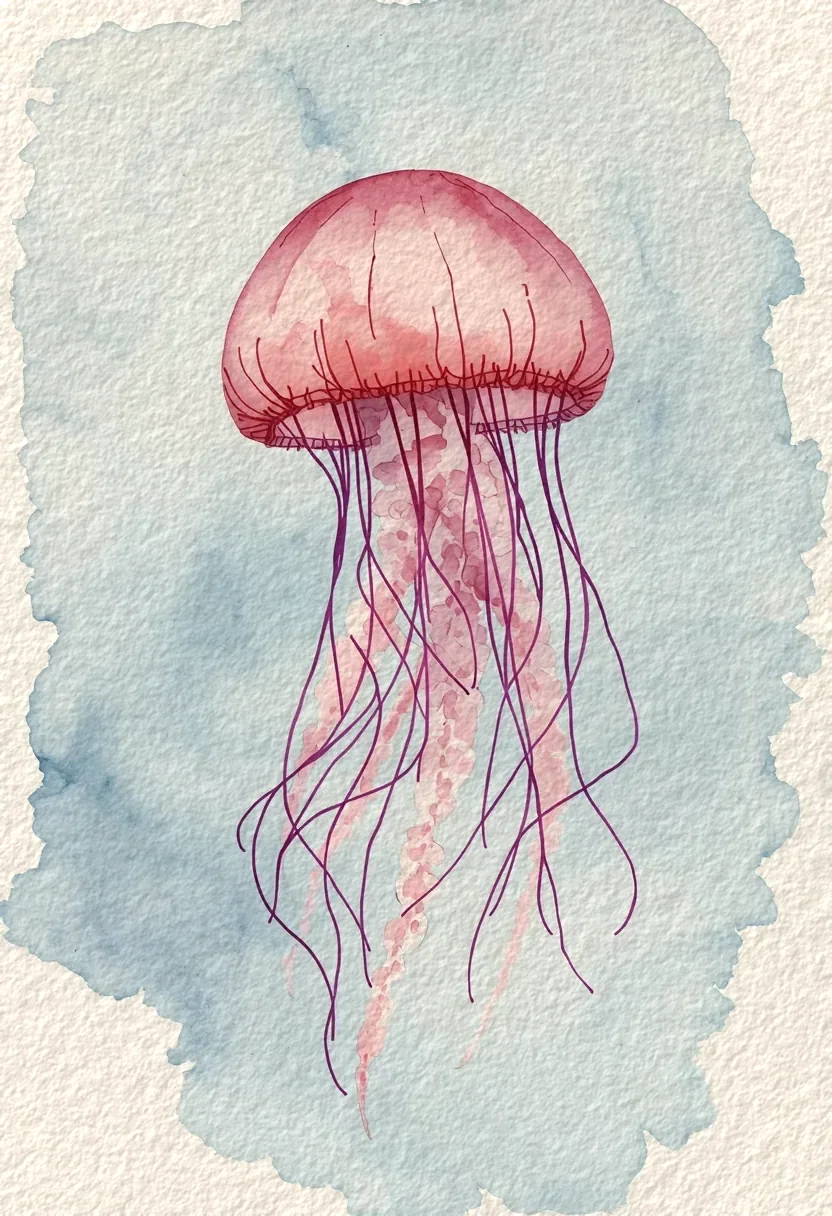 The bell went onto damp paper for a soft edge, the tentacles onto nearly dry paper for thin lines.
A soft rose jellyfish with trailing tentacles, floating in pale blue water. The soft edges come from damp paper.
- Palette: blue (PB29), rose (PV19)
- Paper: 300 gsm cold press
- Time: about 30 minutes · Difficulty: easy+
1. Wet the water. Brush water over the whole page and lay a pale blue wash, darker toward the bottom corners. 2. Drop in the bell. While the paper is still damp, touch a dome of rose near the top so its edge blurs slightly. 3. Trail the tentacles. When the page is nearly dry, pull thin wavy lines of violet downward from the bell with the small round.
10. Eucalyptus Sprig
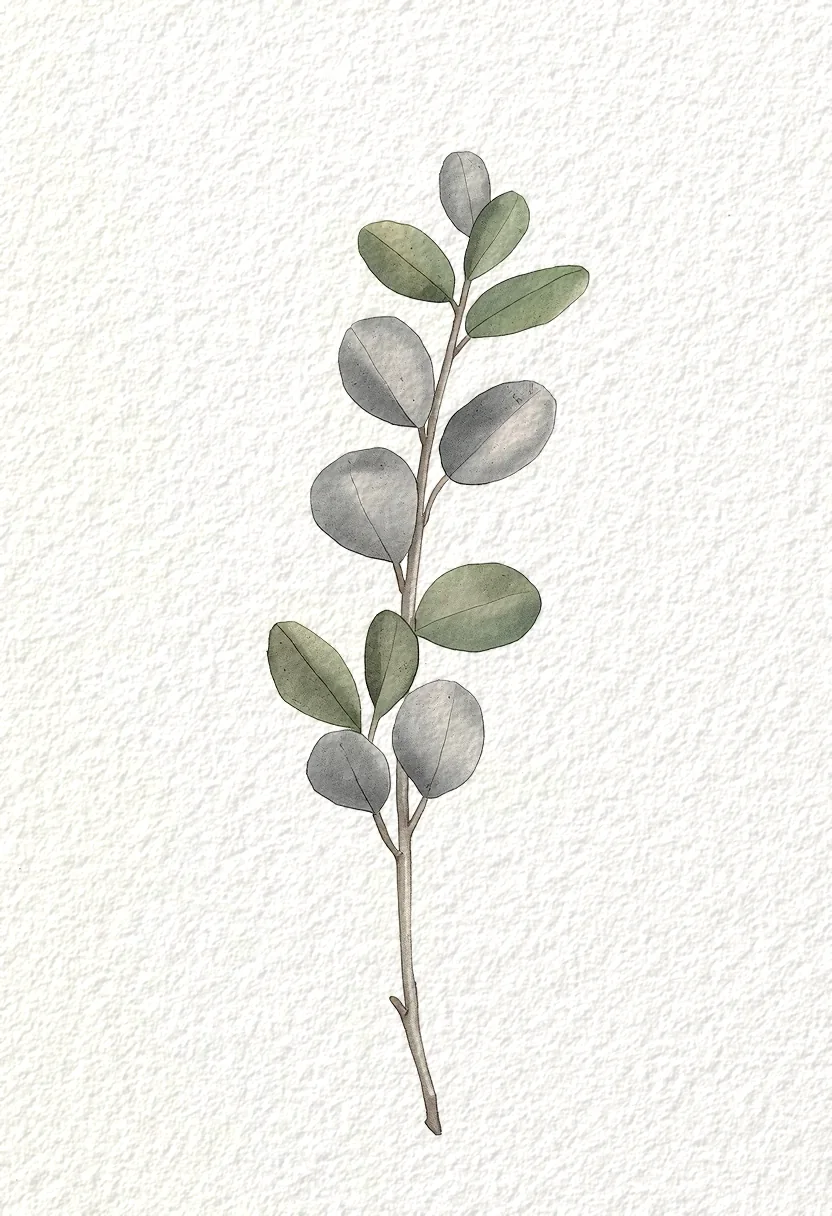 Each leaf is one press of the brush, in a grey-green mixed from all three tubes.
A single stem with round grey-green leaves in pairs. The muted green is the three colors mixed together.
- Palette: blue (PB29), yellow (PY97), rose (PV19)
- Paper: 300 gsm cold press
- Time: about 25 minutes · Difficulty: easy+
1. Mix the leaf color. Make leaf green, then add a touch of rose to dull it to a grey-green. 2. Paint the leaves. Press the medium round flat to the paper to make one round leaf per touch, in pairs up an imagined stem. 3. Add the stem. When the leaves are dry, draw a thin soft grey stem joining them, with a short stalk into each leaf.
GODEEPER: The grey-green in the eucalyptus and the soft grey in the cloud both come from mixing all three tubes. The palette guide explains why three clean primaries mix better than a dozen pre-mixed greens. Split-Primary Palette Guide: Mix Any Color with 6 Tubes →
Simple Watercolor Ideas Worth Framing
The last two easy watercolor ideas for beginners take a little longer, but each one looks finished enough to give away.
11. Loose Roses
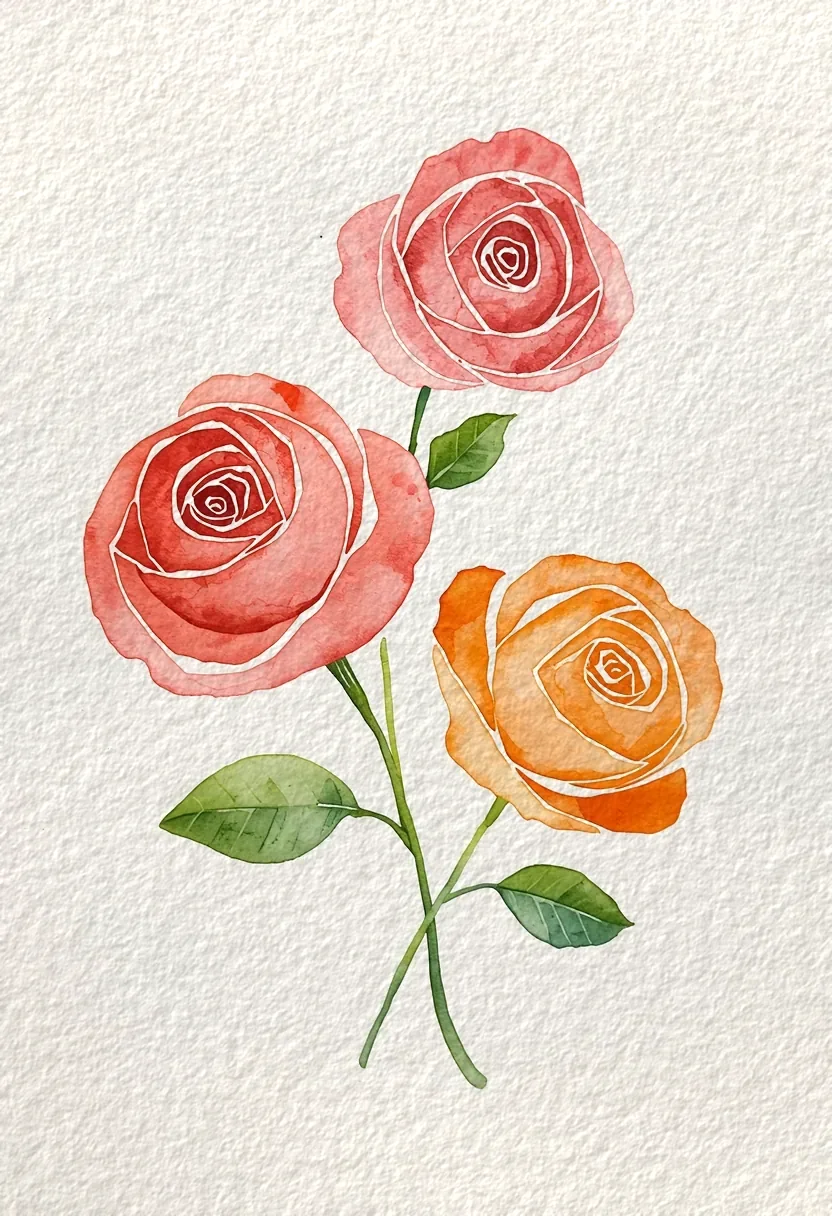 Spiral strokes with small gaps of bare paper between the turns, leaves added once the roses dried.
Two or three roses made from spiral strokes of rose and orange, with a few green leaves. The spiral is loose on purpose.
- Palette: rose (PV19), yellow (PY97), blue (PB29)
- Paper: 300 gsm cold press
- Time: about 35 to 40 minutes · Difficulty: intermediate
1. Paint the spirals. With a watery rose, paint a loose spiral from the center outward, leaving small white gaps between the turns. 2. Deepen the center. While the spiral is damp, drop a stronger rose into the middle so it spreads a little. 3. Add the leaves. When the roses are dry, tuck two or three leaf green leaves between them with a single stroke each.
12. Mountain Reflected in a Lake
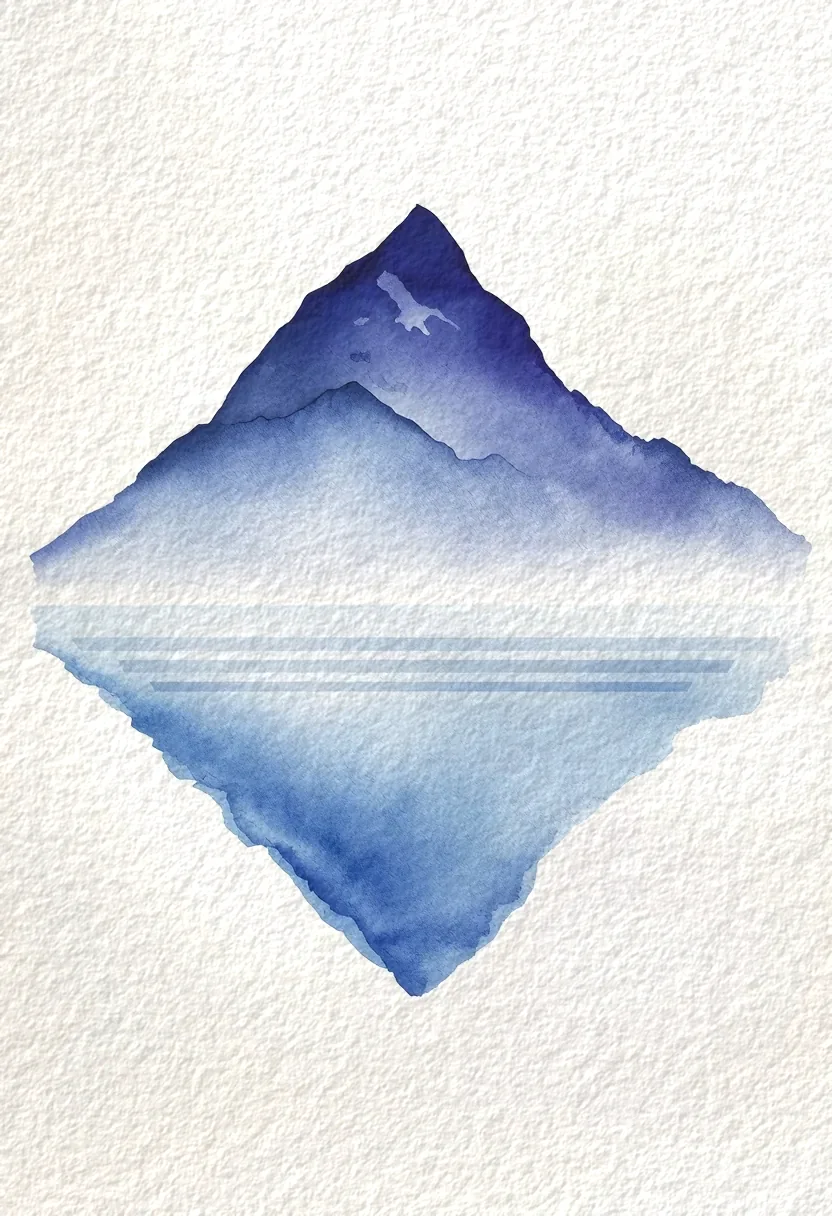 The reflection is the same shape upside down, paler and softer, broken by a few horizontal strokes.
A blue mountain above a flat lake that mirrors it upside down. One horizontal line across the middle makes the water.
- Palette: blue (PB29), rose (PV19), yellow (PY97)
- Paper: 300 gsm cold press
- Time: about 40 minutes · Difficulty: intermediate
1. Paint the mountain. Paint a violet-blue triangle above a light pencil line across the middle of the page, and let it dry. 2. Paint the reflection. Wet the area below the line, then paint the same shape upside down in a paler, softer blue. 3. Break the water. When dry, pull two or three thin horizontal strokes of pale blue across the reflection so it reads as water.
Analysis: Which Idea to Paint First
Work through these easy watercolor ideas for beginners in an order that adds one skill at a time. The sunset (idea 1) teaches you how wet paper behaves, and the rain cloud (idea 6) repeats that on a small scale. The lemon (idea 2) and the lavender (idea 3) teach you to leave paper white and to make a shape with one touch of the brush.
The balloons (idea 4) and the cactus (idea 5) add a second layer on dry paper. Most of the later ideas depend on that skill, so don't skip them. The wet-on-wet watercolor technique guide explains the drying stages in detail if your washes keep bleeding where you didn't want them to.
From there, the salt sky (idea 7) is pure fun and needs no control at all. The hills (idea 8) are where you learn to wait, and where you first glaze one layer over another. If the hills blur into each other, the lower one wasn't dry. The jellyfish (idea 9) and the eucalyptus (idea 10) both lean on the soft edges and muted mixes you have practised by then.
The roses (idea 11) and the lake (idea 12) come last. Each one asks for both a soft blend and a crisp edge in the same piece.
Because all 12 ideas share three tubes, you can paint in batches. Mix one pool of leaf green and use it for the lavender, cactus, hills and roses in a single sitting. Mix one pool of violet for the lavender, balloons, night sky and jellyfish. Painting two ideas side by side uses the drying time well.
Frequently Asked Questions
What is the easiest thing to paint in watercolor? A sunset sky. You wet the paper, touch in yellow, rose and blue in bands, and let them blend on their own. There is nothing to draw and no edge to control. A first try takes about 15 minutes, and most of that is waiting for the paper to dry.
What colors do I need to start watercolor painting? Three tubes are enough: French Ultramarine (PB29), Hansa Yellow Medium (PY97) and Quinacridone Rose (PV19). Blue and yellow make green, blue and rose make purple, rose and yellow make orange. All three together make a soft grey, so you don't need a black or a brown tube to start.
What paper should a beginner use for watercolor? Cold-press watercolor paper at 300 gsm (140 lb). It has a light texture that holds a wash and is heavy enough to take water without buckling much. A cotton sheet stays wet longer and forgives more, but a good cellulose pad is fine for the small ideas on this list.
How long does a simple watercolor painting take? Most ideas here take 15 to 40 minutes, and roughly half of that is drying time. The sunset, lemon slice and lavender are the quickest. The hills, the lake and the loose roses take longer because each layer has to dry before the next one goes on top of it.
Can I paint watercolor without drawing first? Yes. Nine of the twelve ideas on this list need no pencil at all. You paint a shape directly with the brush, such as a balloon, a leaf or a band of sky. A light pencil line only helps on the cactus pot, the lake horizon and the hot air balloon baskets.
Related Reading
- 10 Easy Winter Watercolor Ideas From a 4-Tube Palette: snow scenes in the same idea format, from a blue, a brown, a yellow and a red.
- 11 Christmas Watercolor Ideas to Paint With 5 Tubes: festive objects and scenes with a palette and steps for every idea.
- Best Watercolor Brushes for Beginners: 3 Shapes to Buy: the round brushes these ideas call for, and the sizes that matter.
- Watercolor Pans vs Tubes: What to Buy First, Priced per ml: whether to buy these three colors as tubes or pans.
References

Written by
Elena VancePigments & Color Editor
Elena Vance writes Watercolor Daily's pigment and color coverage: Colour Index codes, lightfastness ratings, transparency, and palette building.
NextKeep reading
Features / 14 min
11 Christmas Watercolor Ideas to Paint With 5 Tubes
Features / 13 min
10 Easy Winter Watercolor Ideas From a 4-Tube Palette
Features / 15 min
12 Easy Watercolor Christmas Card Ideas for Beginners
Features / 14 min
10 Watercolor Birthday Card Ideas From 3 Tubes of Paint
Features / 14 min
12 Easy Watercolor Flower Ideas Sorted by Brush Stroke
Guides / 11 min
Dry Brush Watercolor Technique: 8 Tips for Broken Texture
Guides / 14 min
How to Clean Watercolor Brushes: 7 Steps, 3 Ways to Dry
Guides / 11 min
Flat Wash Watercolor Technique: Flat and Graded in 5 Steps
Disclaimer
This article is published for informational purposes and is not professional advice. Product formulations, pigment sources, packaging and store listings change. Check the details that matter to you (price, pigment content, regional availability) with the manufacturer or retailer before you buy.