Loading
Watercolor Daily · Features
12 Easy Watercolor Christmas Card Ideas for Beginners
Watercolor christmas card ideas for beginners, 12 cards painted from one 5-tube palette. Each idea lists its paints, pigment codes, paper and steps.
15 min readBy Elena Vance
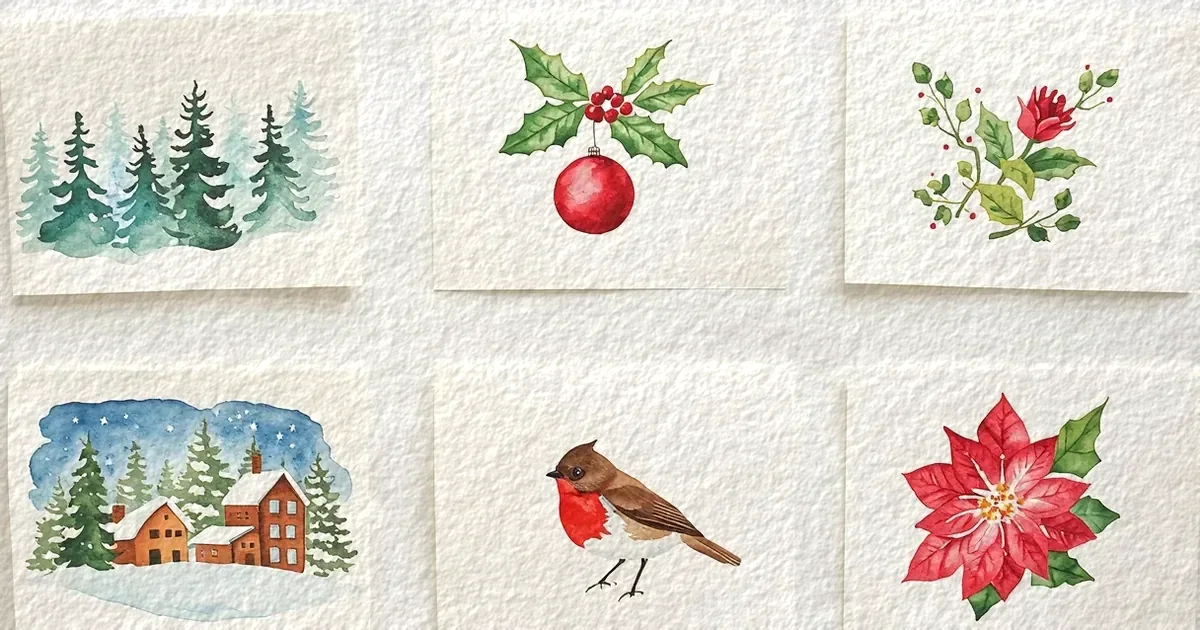
These 12 watercolor christmas card ideas all come from the same five tubes of paint, so one small palette carries you through the whole list. Most card lists show a finished picture and stop there. Each idea below also gives you the paints with their pigment codes, the paper, a rough time and the order to paint it in, so you can copy it on your first try.
In short: Buy five tubes: Pyrrol Scarlet (PR255), Hansa Yellow Medium (PY97), Phthalo Green Blue Shade (PG7), French Ultramarine (PB29) and Burnt Sienna (PBr7). Paint on 300 gsm (140 lb) cold-press paper cut to fold into a 5 x 7 inch card. Start with the pine tree trio, which takes about 15 minutes, and save the night village for last.
What are the easiest watercolor christmas card ideas? (quick answer)
Pine trees, holly and red baubles. Each one is a few brushstrokes in one or two colors, with no drawing and no layers to wait for. Paint those three first, then move on to the cards that use a wet-on-wet sky or masking fluid.
Overview
Every one of these watercolor christmas card ideas uses the same short supply list.
Paper. Cold-press watercolor paper at 300 gsm (140 lb). It folds without cracking and takes a wet sky without buckling much. Cotton sheets hold a wash longer than wood-pulp ones, which helps with the wet-on-wet cards. The watercolor paper guide for beginners explains why. Cut a 7 x 10 inch piece and fold it to 5 x 7 inches, a size that fits a standard A7 envelope. Paint the card flat before you fold it.
Brushes. A medium round (around a size 8) for leaves, trees and washes, and a small round (around a size 4) for berries, eyes and strings. Brush sizes aren't standard between makers, so judge by the belly and the point, not the number.
Paint. The five tubes below, all from Daniel Smith's Extra Fine range, where each one is a single pigment rated lightfastness I (Excellent) on the maker's pigment chart:
- Red, Pyrrol Scarlet (PR255): a clean fire-engine red for baubles, berries, the barn and the robin's breast. Daniel Smith rates it semi-transparent and medium staining.
- Yellow, Hansa Yellow Medium (PY97): a mid yellow that warms the greens and gives the candle its glow.
- Green, Phthalo Green Blue Shade (PG7): a transparent green that stains, so it won't lift once it dries. Daniel Smith advises mixing it rather than using it straight.
- Blue, French Ultramarine (PB29): a warm, transparent blue that granulates (its pigment settles into the paper's grain), which puts a soft texture into skies and snow shadows.
- Brown, Burnt Sienna (PBr7): a transparent, non-staining earth for trunks, branches and greys.
Three mixes do most of the work. Pine green is PG7 with a little PY97. Holly dark is PG7 with a touch of PR255. Snow grey is PB29 with PBr7. The same tubes also cover the rest of a beginner's watercolor supply kit, so nothing here is a one-off purchase.
Two extras are optional: a bottle of masking fluid for snowflakes and stars, and an opaque white such as Titanium White (PW6) for last-minute highlights.
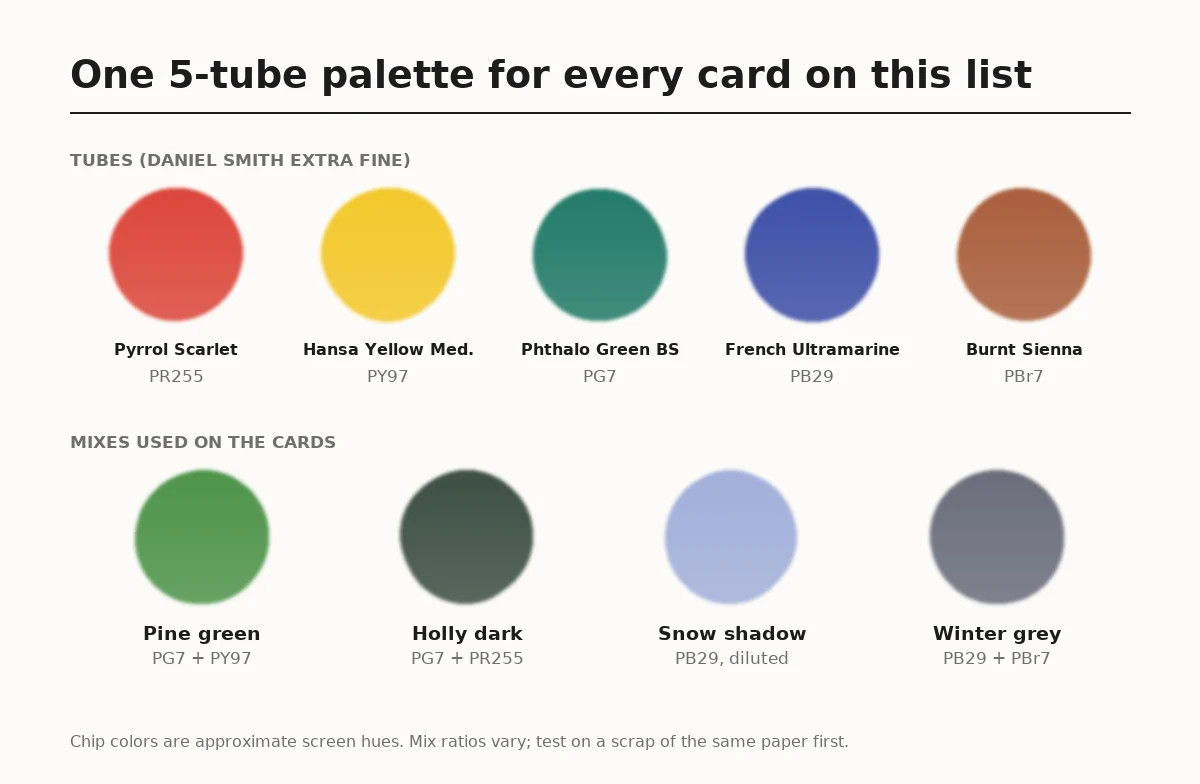 Chart of the five tubes and the four mixes used across the cards. Chip colors are approximate screen hues.
Easy Watercolor Christmas Card Ideas Under 30 Minutes
These six watercolor christmas card ideas need one or two colors and no waiting between layers. They're where to start if this is your first card.
1. Pine Tree Trio
Three trees of different heights, each built from short triangular strokes. It is the easiest card on the list and still looks finished.
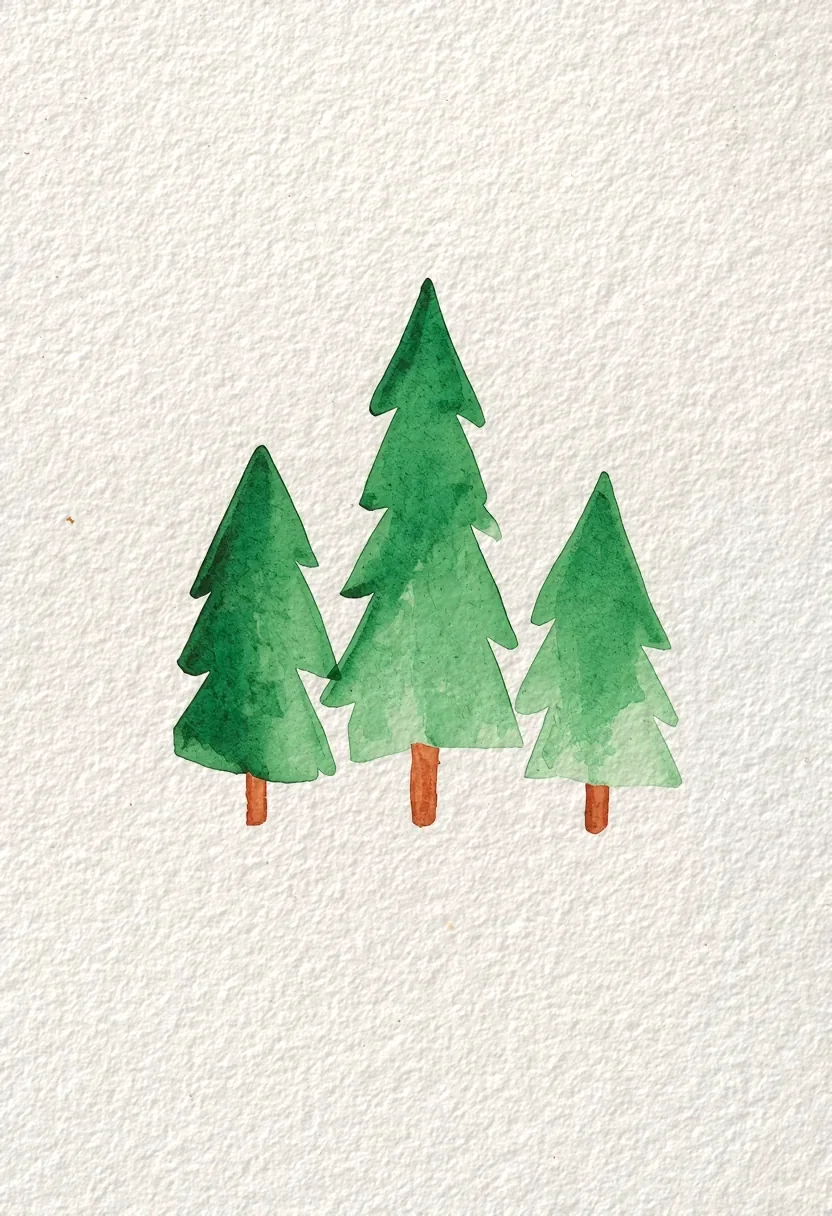 Three pines in one green mix. Add the trunks only after the green is dry.
- Palette: green (PG7), yellow (PY97), brown (PBr7)
- Paper: 300 gsm cold press
- Time: about 15 minutes · Difficulty: easy
1. Mix pine green. Add yellow to green until the green leans toward grass, and keep a darker pool of plain green beside it. 2. Paint from the tip down. Lay short sideways strokes, pressing harder as you move down so each tier gets wider. 3. Add trunks when dry. Paint a short brown trunk under each tree only once the green has dried, so the two colors don't bleed. This is the wet-on-dry watercolor technique in its simplest form.
2. Holly Sprig with Berries
Three or four spiky leaves around a cluster of red berries. The trick is the white highlight on each berry, which you leave as bare paper.
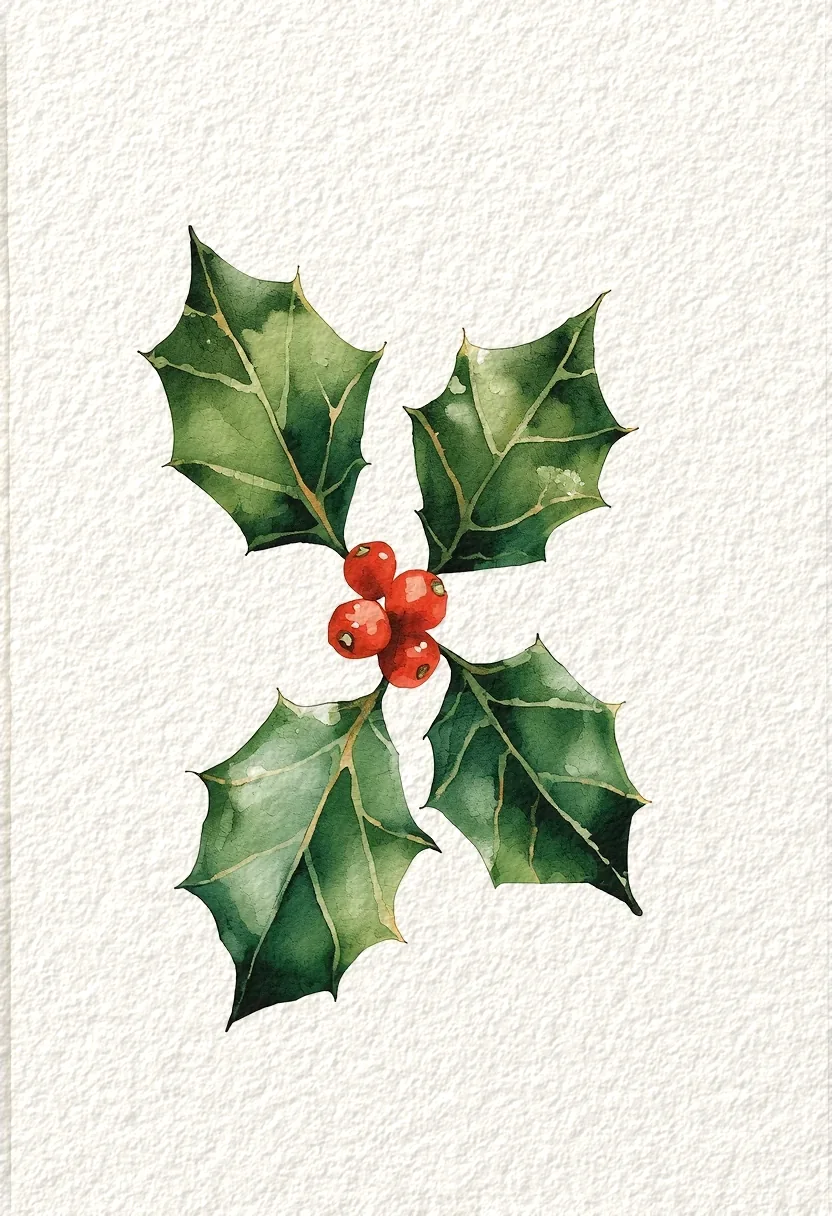 Dark holly leaves with pale veins left in, and berries that keep a dot of white paper for shine.
- Palette: green (PG7), red (PR255), a little yellow (PY97)
- Paper: 300 gsm cold press
- Time: about 20 minutes · Difficulty: easy
1. Paint the leaves. Use holly dark (green with a touch of red) and leave a hairline of white down the middle of each leaf for the vein. 2. Let them dry. Wait until the leaves are completely dry before the berries touch them. 3. Paint the berries. Paint each berry as a small red circle and skip one tiny dot near the top edge. That dot of paper reads as a shine.
3. Hanging Red Baubles
Two or three red ornaments on thin strings. Painted wet-on-wet, the red softens toward one side and looks round.
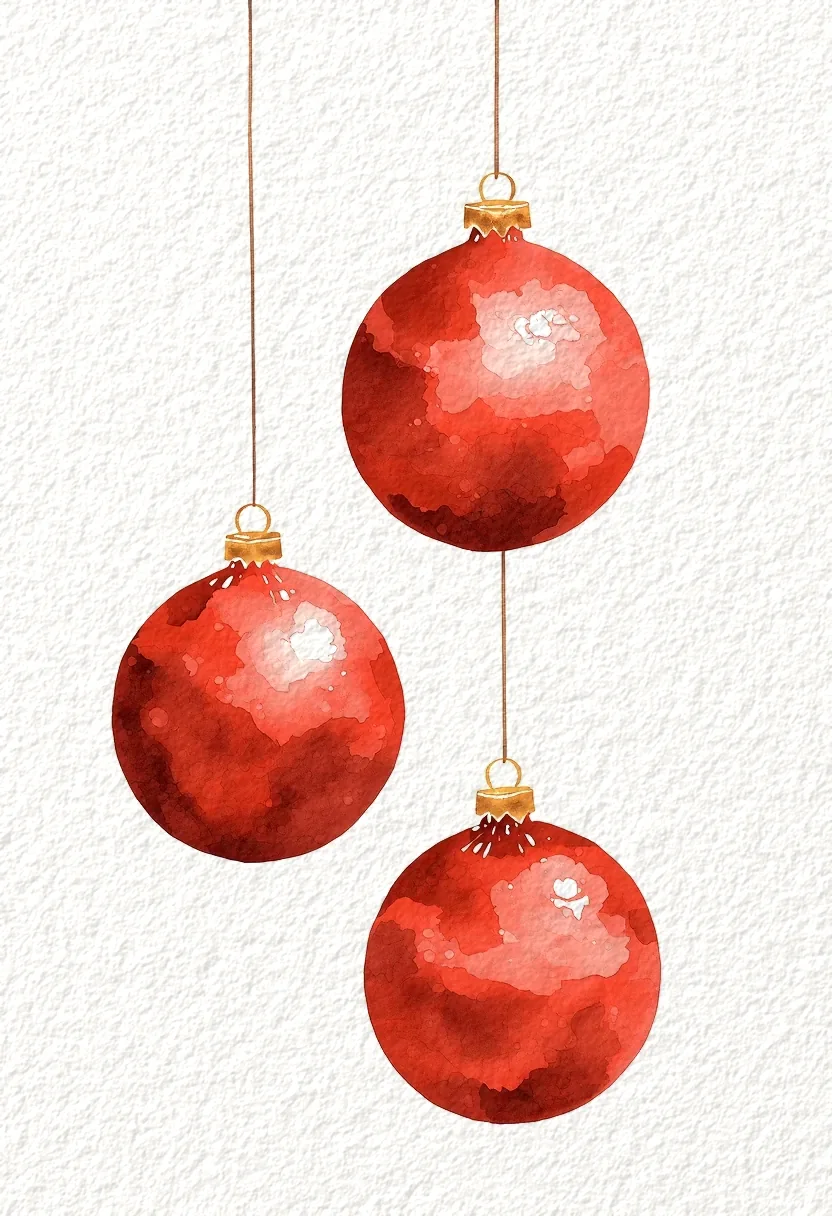 Red softening toward one side is what makes each bauble look round.
- Palette: red (PR255), brown (PBr7), a little blue (PB29)
- Paper: 300 gsm cold press
- Time: about 20 minutes · Difficulty: easy
1. Wet each circle. Brush clean water inside a circle, leaving a small dry spot for the highlight. 2. Drop in the red. Touch red onto the side away from the highlight and let it spread. A touch of blue on the far edge deepens the shadow. 3. Add caps and strings. Once dry, paint a small brown cap and a thin string with the small round.
4. Pines on a Winter Sky
A blue sky fading to white, with dark pines standing in the snow below. The sky is one wet-on-wet wash.
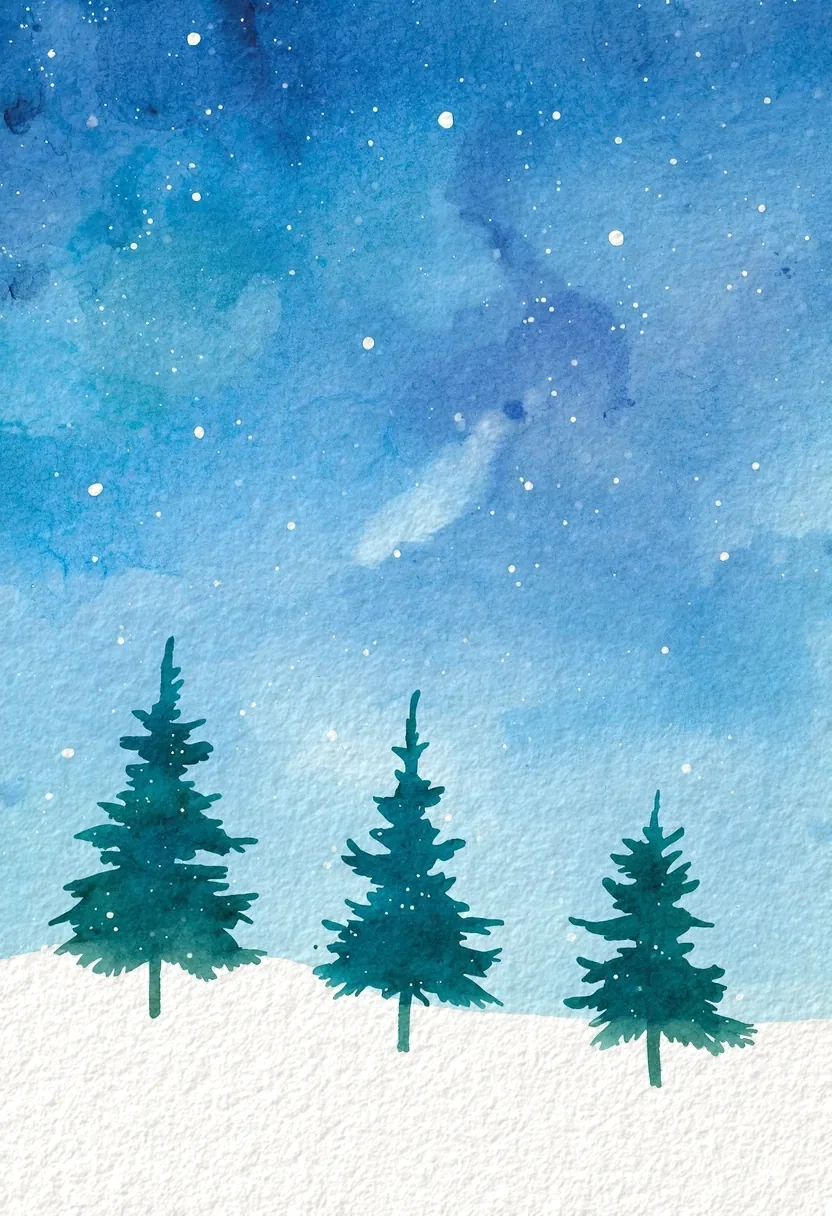 The sky fades from strong blue to almost nothing, and the snow below is untouched paper.
- Palette: blue (PB29), green (PG7), yellow (PY97)
- Paper: 300 gsm cold press
- Time: about 25 minutes plus drying · Difficulty: easy
1. Wet the top two thirds. Brush clean water over the sky area and stop where the snow will be. 2. Charge in the blue. Drop blue heavily along the top and let it fade downward on its own. Leave the bottom third as dry, bare paper for snow. 3. Add the pines. When the sky is completely dry, paint three small trees in a dark mix of green with a little yellow.
5. Simple Christmas Wreath
A ring of leaf strokes with a few berries and a bow. A drinking glass traced lightly in pencil gives you the circle.
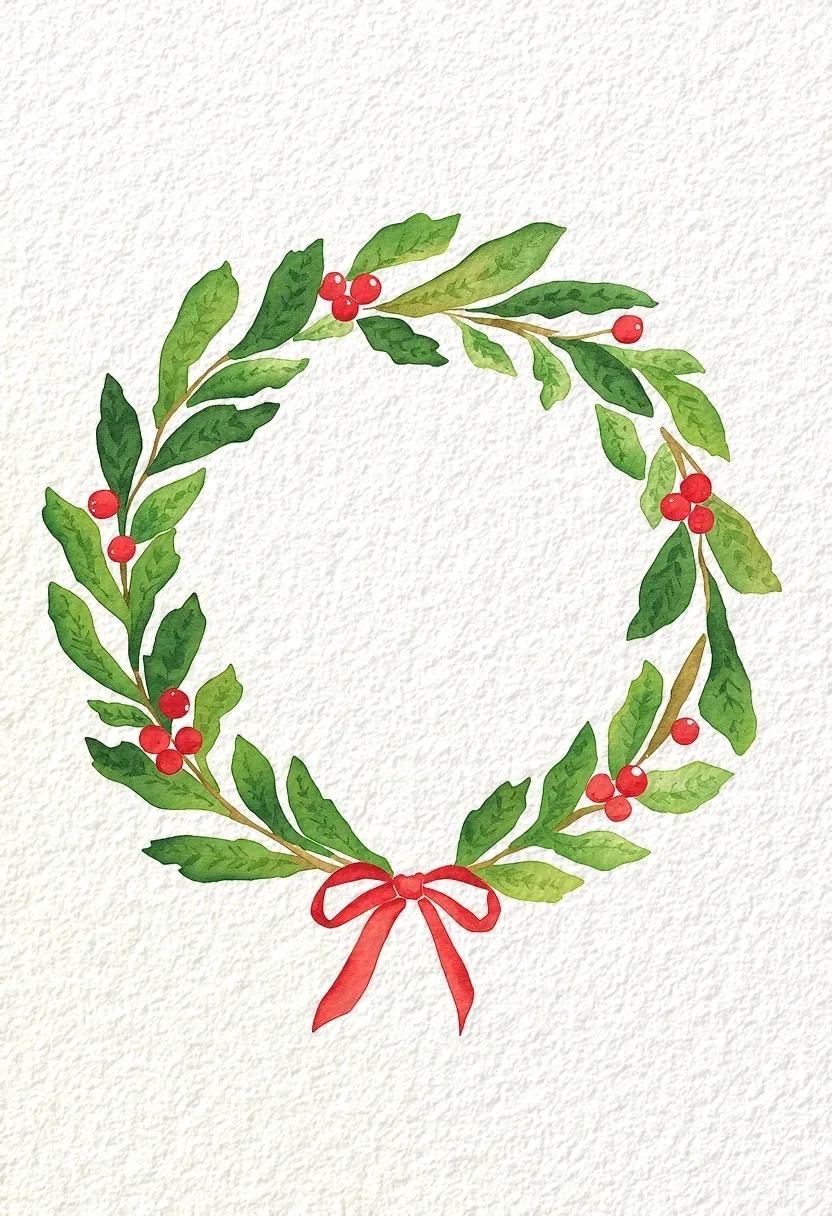 Leaf strokes alternate sides of the circle, with berries in small groups and the bow added last.
- Palette: green (PG7), yellow (PY97), red (PR255)
- Paper: 300 gsm cold press
- Time: about 25 minutes · Difficulty: easy
1. Trace a guide circle. Draw it very lightly. You will erase it at the end. 2. Paint leaves along the line. Alternate sides of the circle, and vary the green by adding more or less yellow so the ring doesn't look flat. 3. Finish with red. Add berries in groups of three, then a small red bow at the bottom.
6. Masked Snowflakes on Blue
White snowflakes on a graded blue wash. The snowflakes are bare paper, protected by masking fluid while you paint the blue.
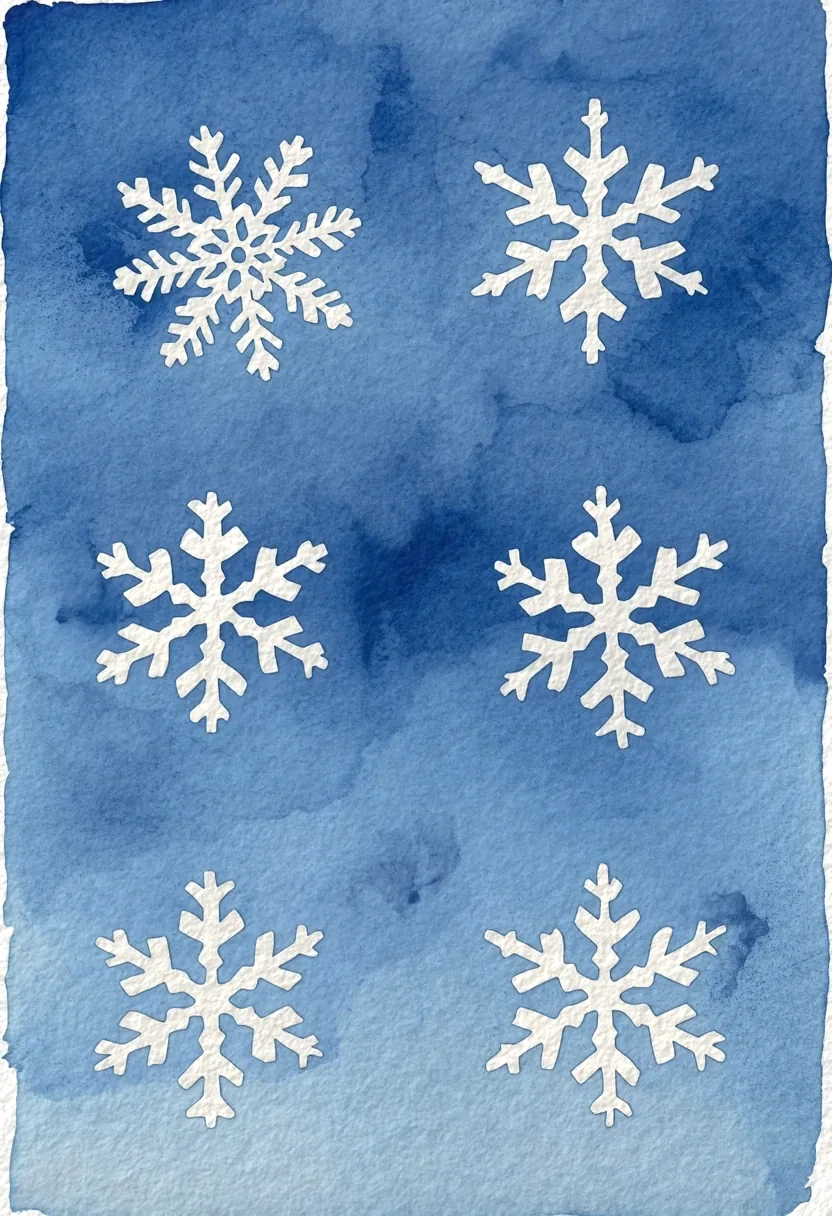 Masked snowflakes stay crisp and white while the blue wash moves freely around them.
- Palette: blue (PB29), a touch of green (PG7), masking fluid
- Paper: 300 gsm cold press, completely dry
- Time: about 30 minutes plus drying · Difficulty: easy+
1. Draw the snowflakes in masking fluid. Use an old brush or a ruling pen and let the fluid dry fully. Winsor & Newton warns not to apply its masking fluid on damp or soft-sized paper, and to wash brushes straight after use. 2. Paint a graded wash. Lay strong blue at the top and add water with each stroke as you move down. 3. Remove the mask. Once the wash is bone dry, rub the mask off with a clean finger. Winsor & Newton advises removing it as soon as possible, so don't leave it on for days. The rough watercolor paper guide shows a masked wash up close.
GODEEPER: Ideas 3 and 4 depend on paint spreading into wet paper. The wet-on-wet guide explains how wet the sheet should be and how to avoid hard blooms. Wet-on-Wet Watercolor Technique: Complete Beginner Guide →
Watercolor Christmas Card Ideas With One Extra Technique
Each of these adds one new skill to the first six. They take a little longer, mostly because of drying time.
7. Red Barn in the Snow
A small red barn and two pines under a soft grey sky. Most of the snow is paper you never touch.
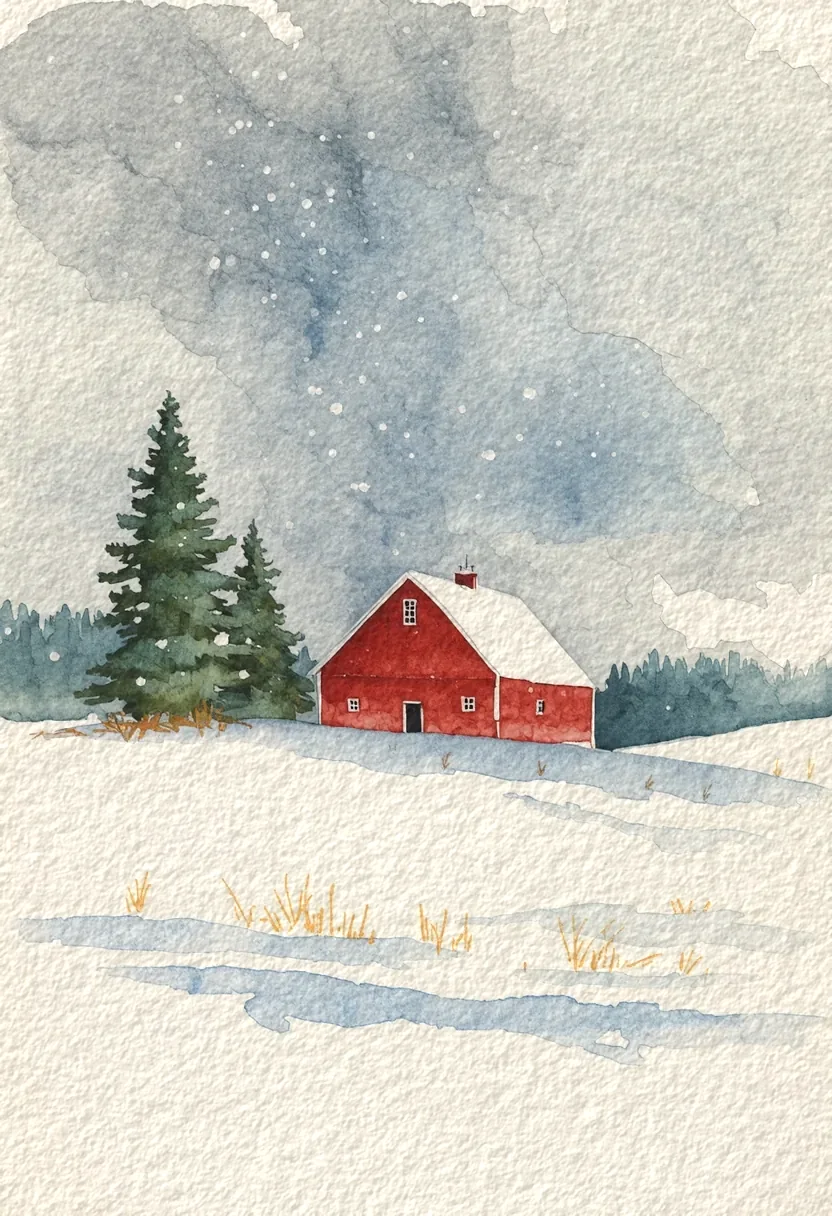 A soft grey sky, a small red barn and long blue shadows across a field of bare paper.
- Palette: red (PR255), brown (PBr7), blue (PB29), green (PG7)
- Paper: 300 gsm cold press
- Time: about 40 minutes plus drying · Difficulty: intermediate
1. Paint a wet-on-wet sky. Wet the sky and drop in snow grey (blue with brown), letting it bloom. Keep the field dry. 2. Paint the barn. When the sky is dry, paint the barn in red with a little brown on the shaded side, leaving the roof white. 3. Add pines and shadows. Paint the pines in holly dark, then lay thin blue shadows across the snow. Ultramarine granulates, which gives the snow a little texture.
8. Robin on a Branch
A round robin with an orange-red breast on a bare twig. It looks detailed but uses only four paints.
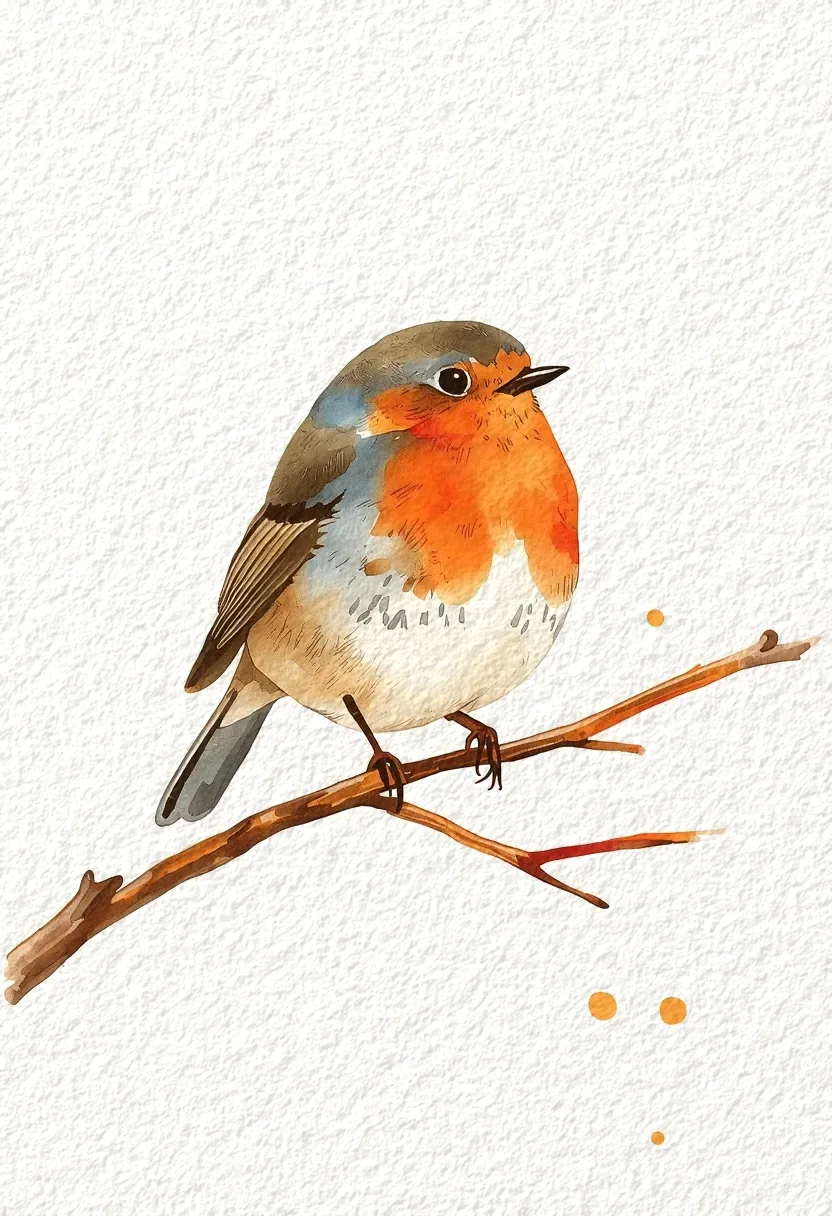 The orange breast goes down first, then the brown back, with the belly left as paper.
- Palette: red (PR255), yellow (PY97), brown (PBr7), blue (PB29)
- Paper: 300 gsm cold press
- Time: about 35 minutes · Difficulty: intermediate
1. Paint the breast first. Mix red with yellow for orange and paint the breast in one wet patch. 2. Add the back and wings. When the breast is dry, paint the back in brown. Leave the belly as white paper. 3. Finish small. Paint the branch in brown and the eye and beak in a strong mix of blue with brown.
9. Loose Poinsettia
A red star of petals with a yellow center. Each petal is one press-and-lift stroke of the round brush.
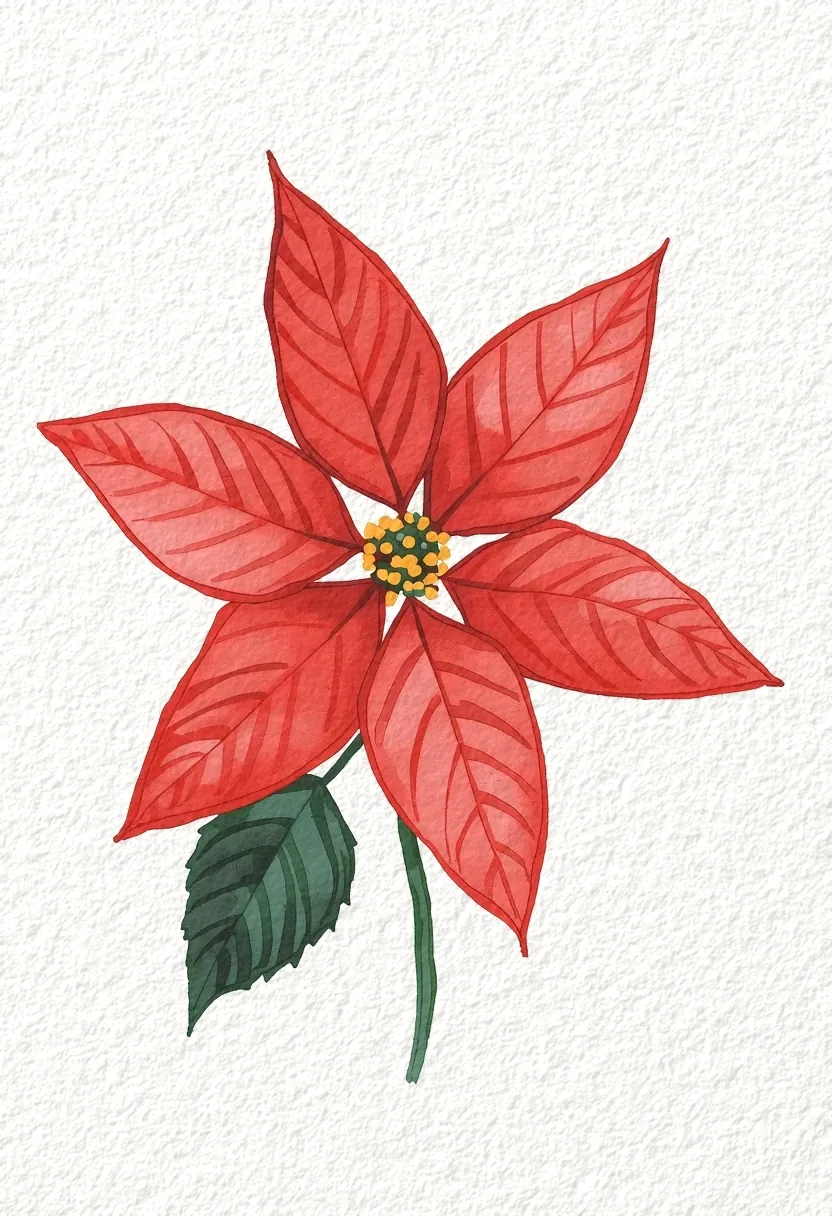 Each petal is a single stroke, with a hairline of white keeping neighbors apart.
- Palette: red (PR255), green (PG7), yellow (PY97)
- Paper: 300 gsm cold press
- Time: about 30 minutes · Difficulty: intermediate
1. Paint alternate petals. Paint every other petal first, so no two wet petals touch and merge. 2. Fill the gaps. When the first petals are dry, paint the rest, leaving a hairline of white between them. 3. Add the center and leaves. Dot yellow in the center and paint two leaves in holly dark.
10. Night Village with Stars
Little houses with lit windows under a deep blue sky. Masking fluid keeps the windows, stars and roof snow white while the sky goes on.
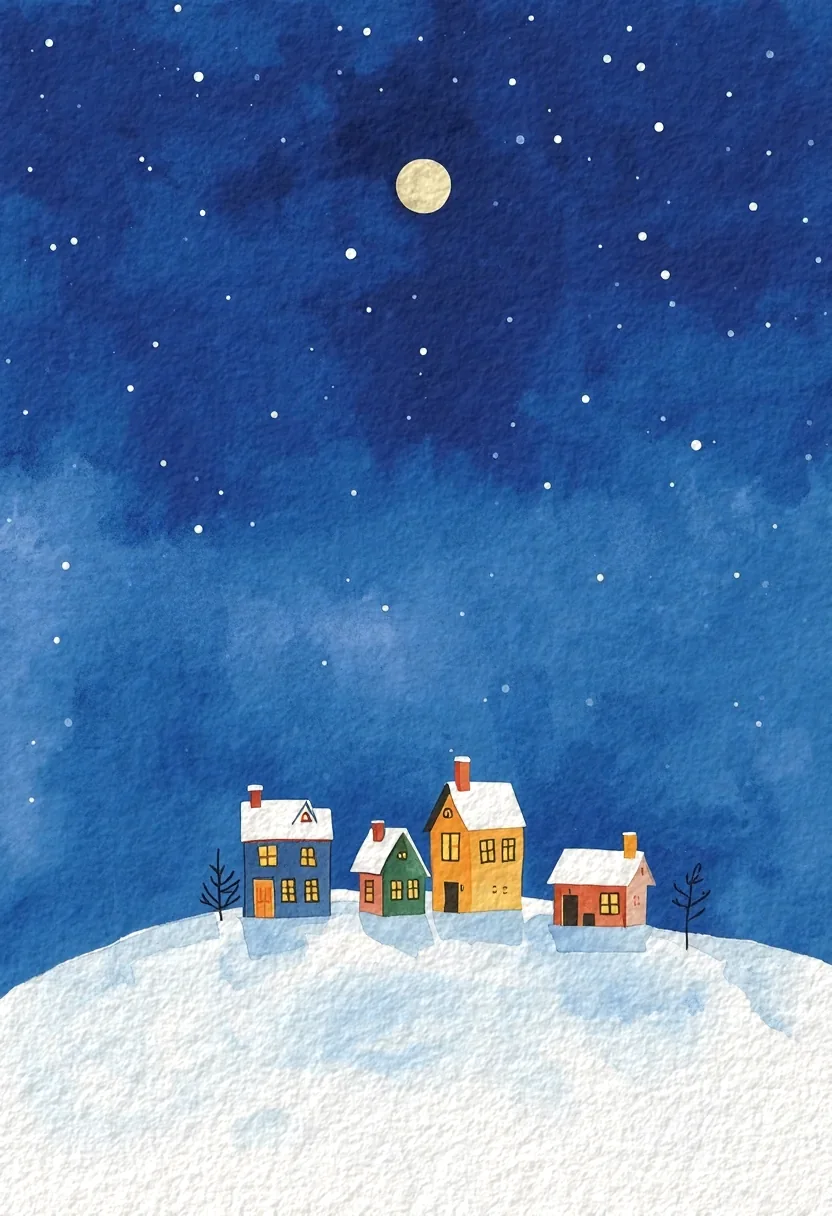 Mask the windows, stars and roof snow before the dark sky goes on, then paint the windows yellow.
- Palette: blue (PB29), brown (PBr7), yellow (PY97), red (PR255), masking fluid
- Paper: 300 gsm cold press, completely dry
- Time: about 45 minutes plus drying · Difficulty: intermediate
1. Mask the whites. Cover the windows, moon, stars and roofs with masking fluid and let it dry. 2. Paint a dark sky. Lay strong blue over the sky, deepened with a little brown near the top. 3. Unmask and color. Remove the mask once the sky is dry, then paint the windows yellow and the houses red or brown.
11. Shadow-Only Snowman
A snowman made almost entirely of bare paper, shaped by a blue shadow on one side. It is the clearest lesson on this list in painting the shadow instead of the snow.
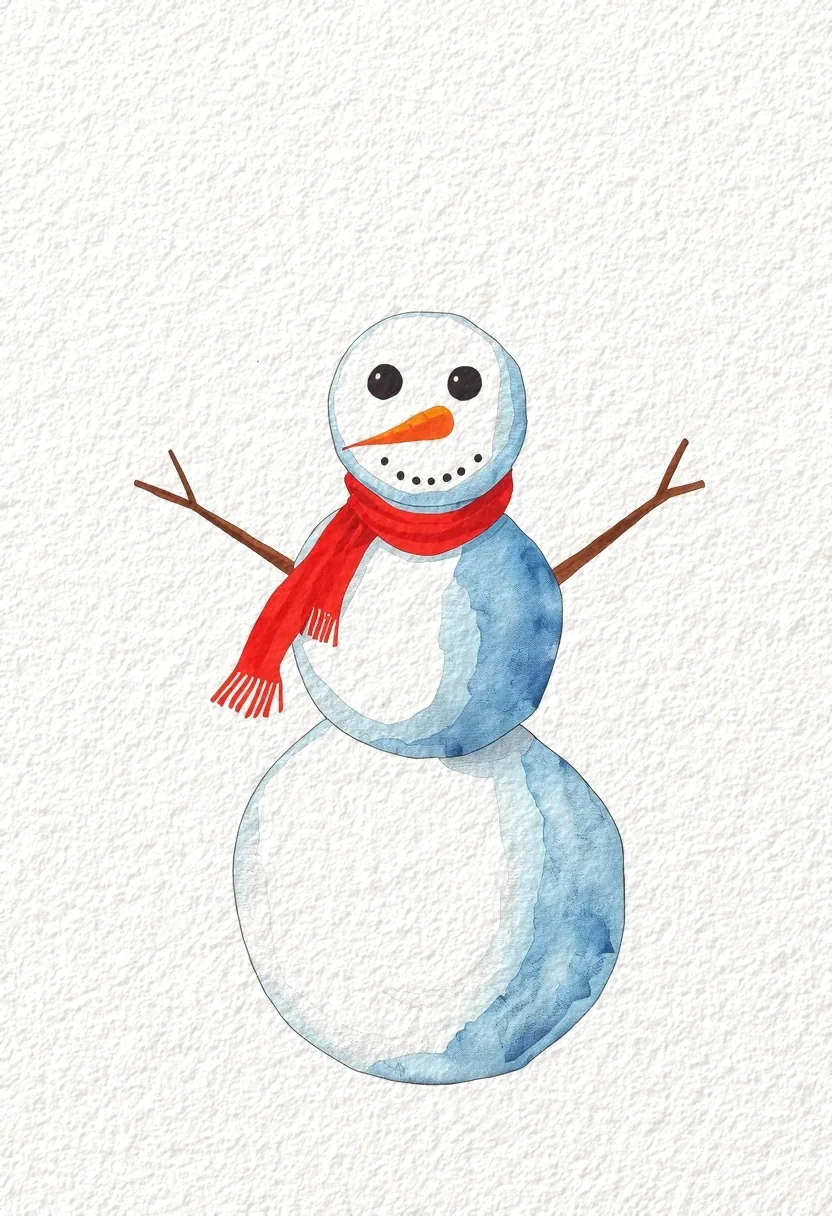 Almost all of the snowman is bare paper, shaped by a blue crescent of shadow.
- Palette: blue (PB29), red (PR255), yellow (PY97), brown (PBr7)
- Paper: 300 gsm cold press
- Time: about 25 minutes · Difficulty: easy+
1. Draw two faint circles. Use a light pencil line, or no line at all if you are confident. 2. Paint only the shadow. Lay diluted blue in a crescent along one side of each circle, then soften the inner edge with a clean damp brush. 3. Add the details. When dry, paint a red scarf, an orange nose (red with yellow) and brown twig arms.
12. Candle with a Soft Glow
A single candle with a warm halo fading into the paper. The glow is a wet-on-wet bloom of pale yellow.
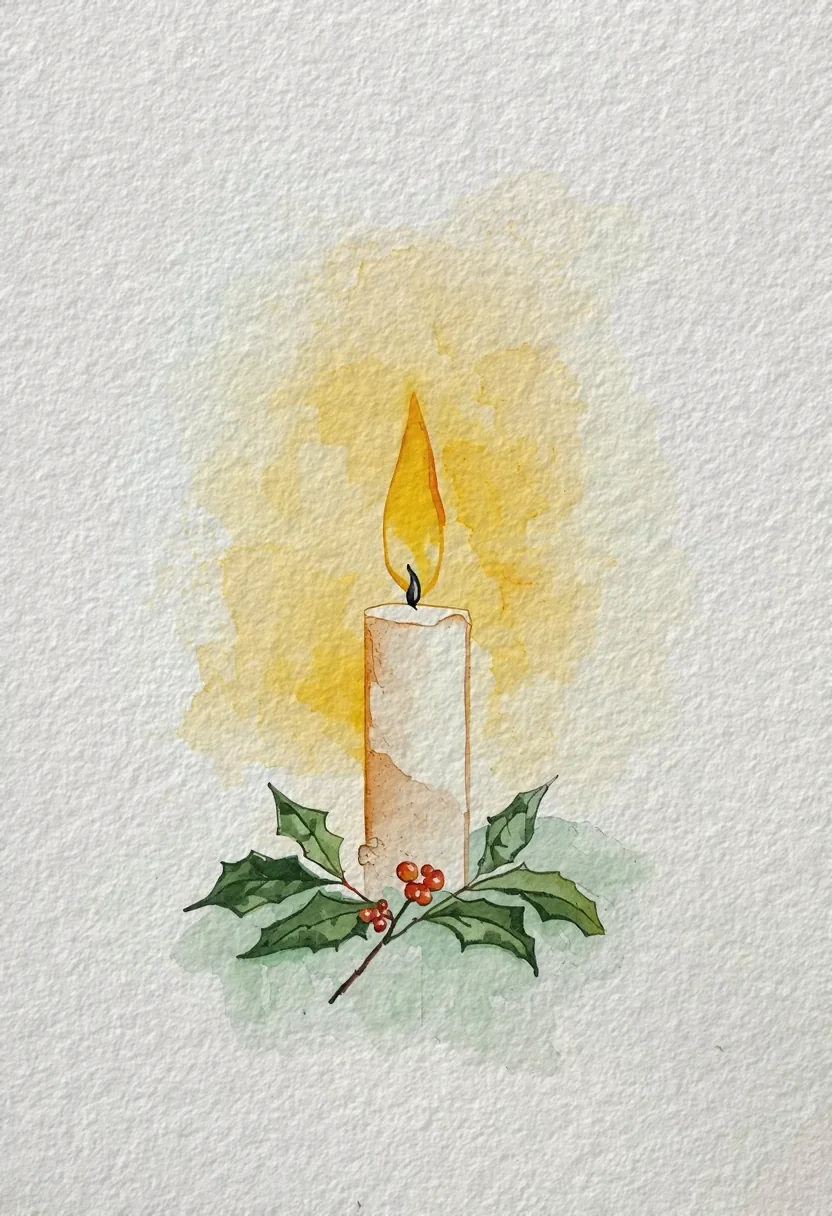 The glow is a pale yellow wash that fades out on its own into the paper.
- Palette: yellow (PY97), red (PR255), brown (PBr7), green (PG7)
- Paper: 300 gsm cold press
- Time: about 30 minutes plus drying · Difficulty: intermediate
1. Paint the glow. Wet a wide oval around where the flame will sit and drop in pale yellow so it fades out on its own. 2. Add the flame and candle. When dry, paint the flame in yellow with a touch of red at the tip, and the candle with a pale brown shadow down one side. 3. Add holly at the base. Finish with a small holly sprig in holly dark and red berries.
GODEEPER: Ideas 7, 10 and 11 are snow scenes at heart. The snow guide covers masking, blue shadows, salt texture and opaque white in more depth. How to Paint Snow in Watercolor: 9 Tips for Clean Whites →
Analysis: Which Card to Paint First
Work through these watercolor christmas card ideas roughly in the order that builds one skill at a time. Start with the pine tree trio (idea 1), which teaches brush pressure. Move to the holly sprig (idea 2), which teaches you to leave paper white on purpose. The baubles (idea 3) are your first wet-on-wet shape, and the winter sky (idea 4) is your first wet-on-wet wash.
From there, the masked snowflakes (idea 6) introduce masking fluid, and the night village (idea 10) uses the same skill on a bigger scale. The barn (idea 7) combines a wet sky, reserved white and shadows in one card, which makes it a good test of everything before it.
Because all twelve cards share five tubes, you can paint them in batches. Mix a pool of pine green and use it for ideas 1, 4 and 5 in one sitting, then a pool of holly dark for 2, 9 and 12. Painting eight or ten cards side by side is faster than one at a time, since each card dries while you work on the next. A card that goes wrong is a small loss, which is the best reason to treat watercolor christmas card ideas as practice.
Frequently Asked Questions
What is the easiest thing to paint on a watercolor Christmas card? A row of pine trees. Each tree is a stack of short triangular strokes in one green, so there is no drawing, no blending and nothing to wait for. Add a brown trunk once the green has dried. Most people can paint three trees on a card in about fifteen minutes.
What colors do I need for watercolor Christmas cards? Five tubes cover every card on this list: Pyrrol Scarlet (PR255), Hansa Yellow Medium (PY97), Phthalo Green Blue Shade (PG7), French Ultramarine (PB29) and Burnt Sienna (PBr7). Mix the pine greens, dark holly greens and snow greys from those five instead of buying premixed colors.
What paper is best for watercolor Christmas cards? Cold-press watercolor paper at 300 gsm (140 lb), ideally 100% cotton. It folds without cracking and takes a wet sky without buckling much. Cut a 7 x 10 inch piece and fold it to 5 x 7 inches, a size that fits a standard A7 envelope.
How do you keep white snow on a watercolor card? Leave the paper unpainted. In transparent watercolor the paper is the brightest white you have, so snow is the area you don't paint, shaped by the blue shadows around it. For small, sharp whites such as snowflakes or stars, cover the paper with masking fluid first.
How long does a watercolor Christmas card take to paint? The simplest cards here take 15 to 30 minutes, most of it drying time. Cards with a wet-on-wet sky or masking fluid take longer, because each layer must dry completely before the next goes on. Plan an afternoon for a batch of eight to ten cards painted side by side.
Related Reading
- Split-Primary Palette Guide: Mix Any Color with 6 Tubes: the color logic behind a short palette, if you want to go beyond these five tubes.
- 11 Christmas Watercolor Ideas to Paint With 5 Tubes: new festive subjects on the same five tubes, from a candy cane to a snowy street.
- Best Watercolor Brushes for Beginners: 3 Shapes to Buy: which round brushes handle both leaves and fine strings.
- Watercolor Paper Weight GSM: 190 vs 300 vs 640 Explained: why 300 gsm is the right weight for a folded card.
- 10 Easy Winter Watercolor Ideas From a 4-Tube Palette: winter scenes for after the holidays, from four tubes and no green.
References
- Daniel Smith: Pyrrol Scarlet Watercolor
- Daniel Smith: Phthalo Green (Blue Shade) Watercolor
- Daniel Smith: Hansa Yellow Medium Watercolor
- Daniel Smith: French Ultramarine Watercolor
- Daniel Smith: Burnt Sienna Watercolor
- Daniel Smith: Watercolor pigment characteristics chart (PDF)
- Winsor & Newton: Art Masking Fluid
- Winsor & Newton: Professional Watercolour Titanium White

Written by
Elena VancePigments & Color Editor
Elena Vance writes Watercolor Daily's pigment and color coverage: Colour Index codes, lightfastness ratings, transparency, and palette building.
NextKeep reading
Features / 13 min
10 Easy Winter Watercolor Ideas From a 4-Tube Palette

Features / 14 min
12 Easy Watercolor Ideas for Beginners From 3 Tubes
Features / 14 min
11 Christmas Watercolor Ideas to Paint With 5 Tubes
Features / 14 min
10 Watercolor Birthday Card Ideas From 3 Tubes of Paint
Features / 14 min
12 Easy Watercolor Flower Ideas Sorted by Brush Stroke
Guides / 11 min
Dry Brush Watercolor Technique: 8 Tips for Broken Texture
Guides / 14 min
How to Clean Watercolor Brushes: 7 Steps, 3 Ways to Dry
Guides / 11 min
Flat Wash Watercolor Technique: Flat and Graded in 5 Steps
Disclaimer
This article is published for informational purposes and is not professional advice. Product formulations, pigment sources, packaging and store listings change. Check the details that matter to you (price, pigment content, regional availability) with the manufacturer or retailer before you buy.